floor tiles

Slate Tiled Floor Cubicle Renovation West Wickham

Multi Coloured Slate floor in desperate need of a deep clean West Wickham

Having previously completed the restoration of a stone floor for this client in the village of West Wickham near Cambridge I was asked to return to look at the Multi-Coloured Slate tiles in the Kitchen of a rental property. The Slate floor had been laid throughout the Kitchen/Diner through to the Hallway and Utility room.

Multi-coloured Slate Tiled Floor Before Cleaning West Wickham

Over the years the sealer had worn down and dirt had become engrained in the pores of the Slate and had discoloured the grout. They were now in need of a deep clean and the tenant was pleased to be having the work done. It is always a delight to have an existing client have you back as there is no better testament of how happy they have been your work.
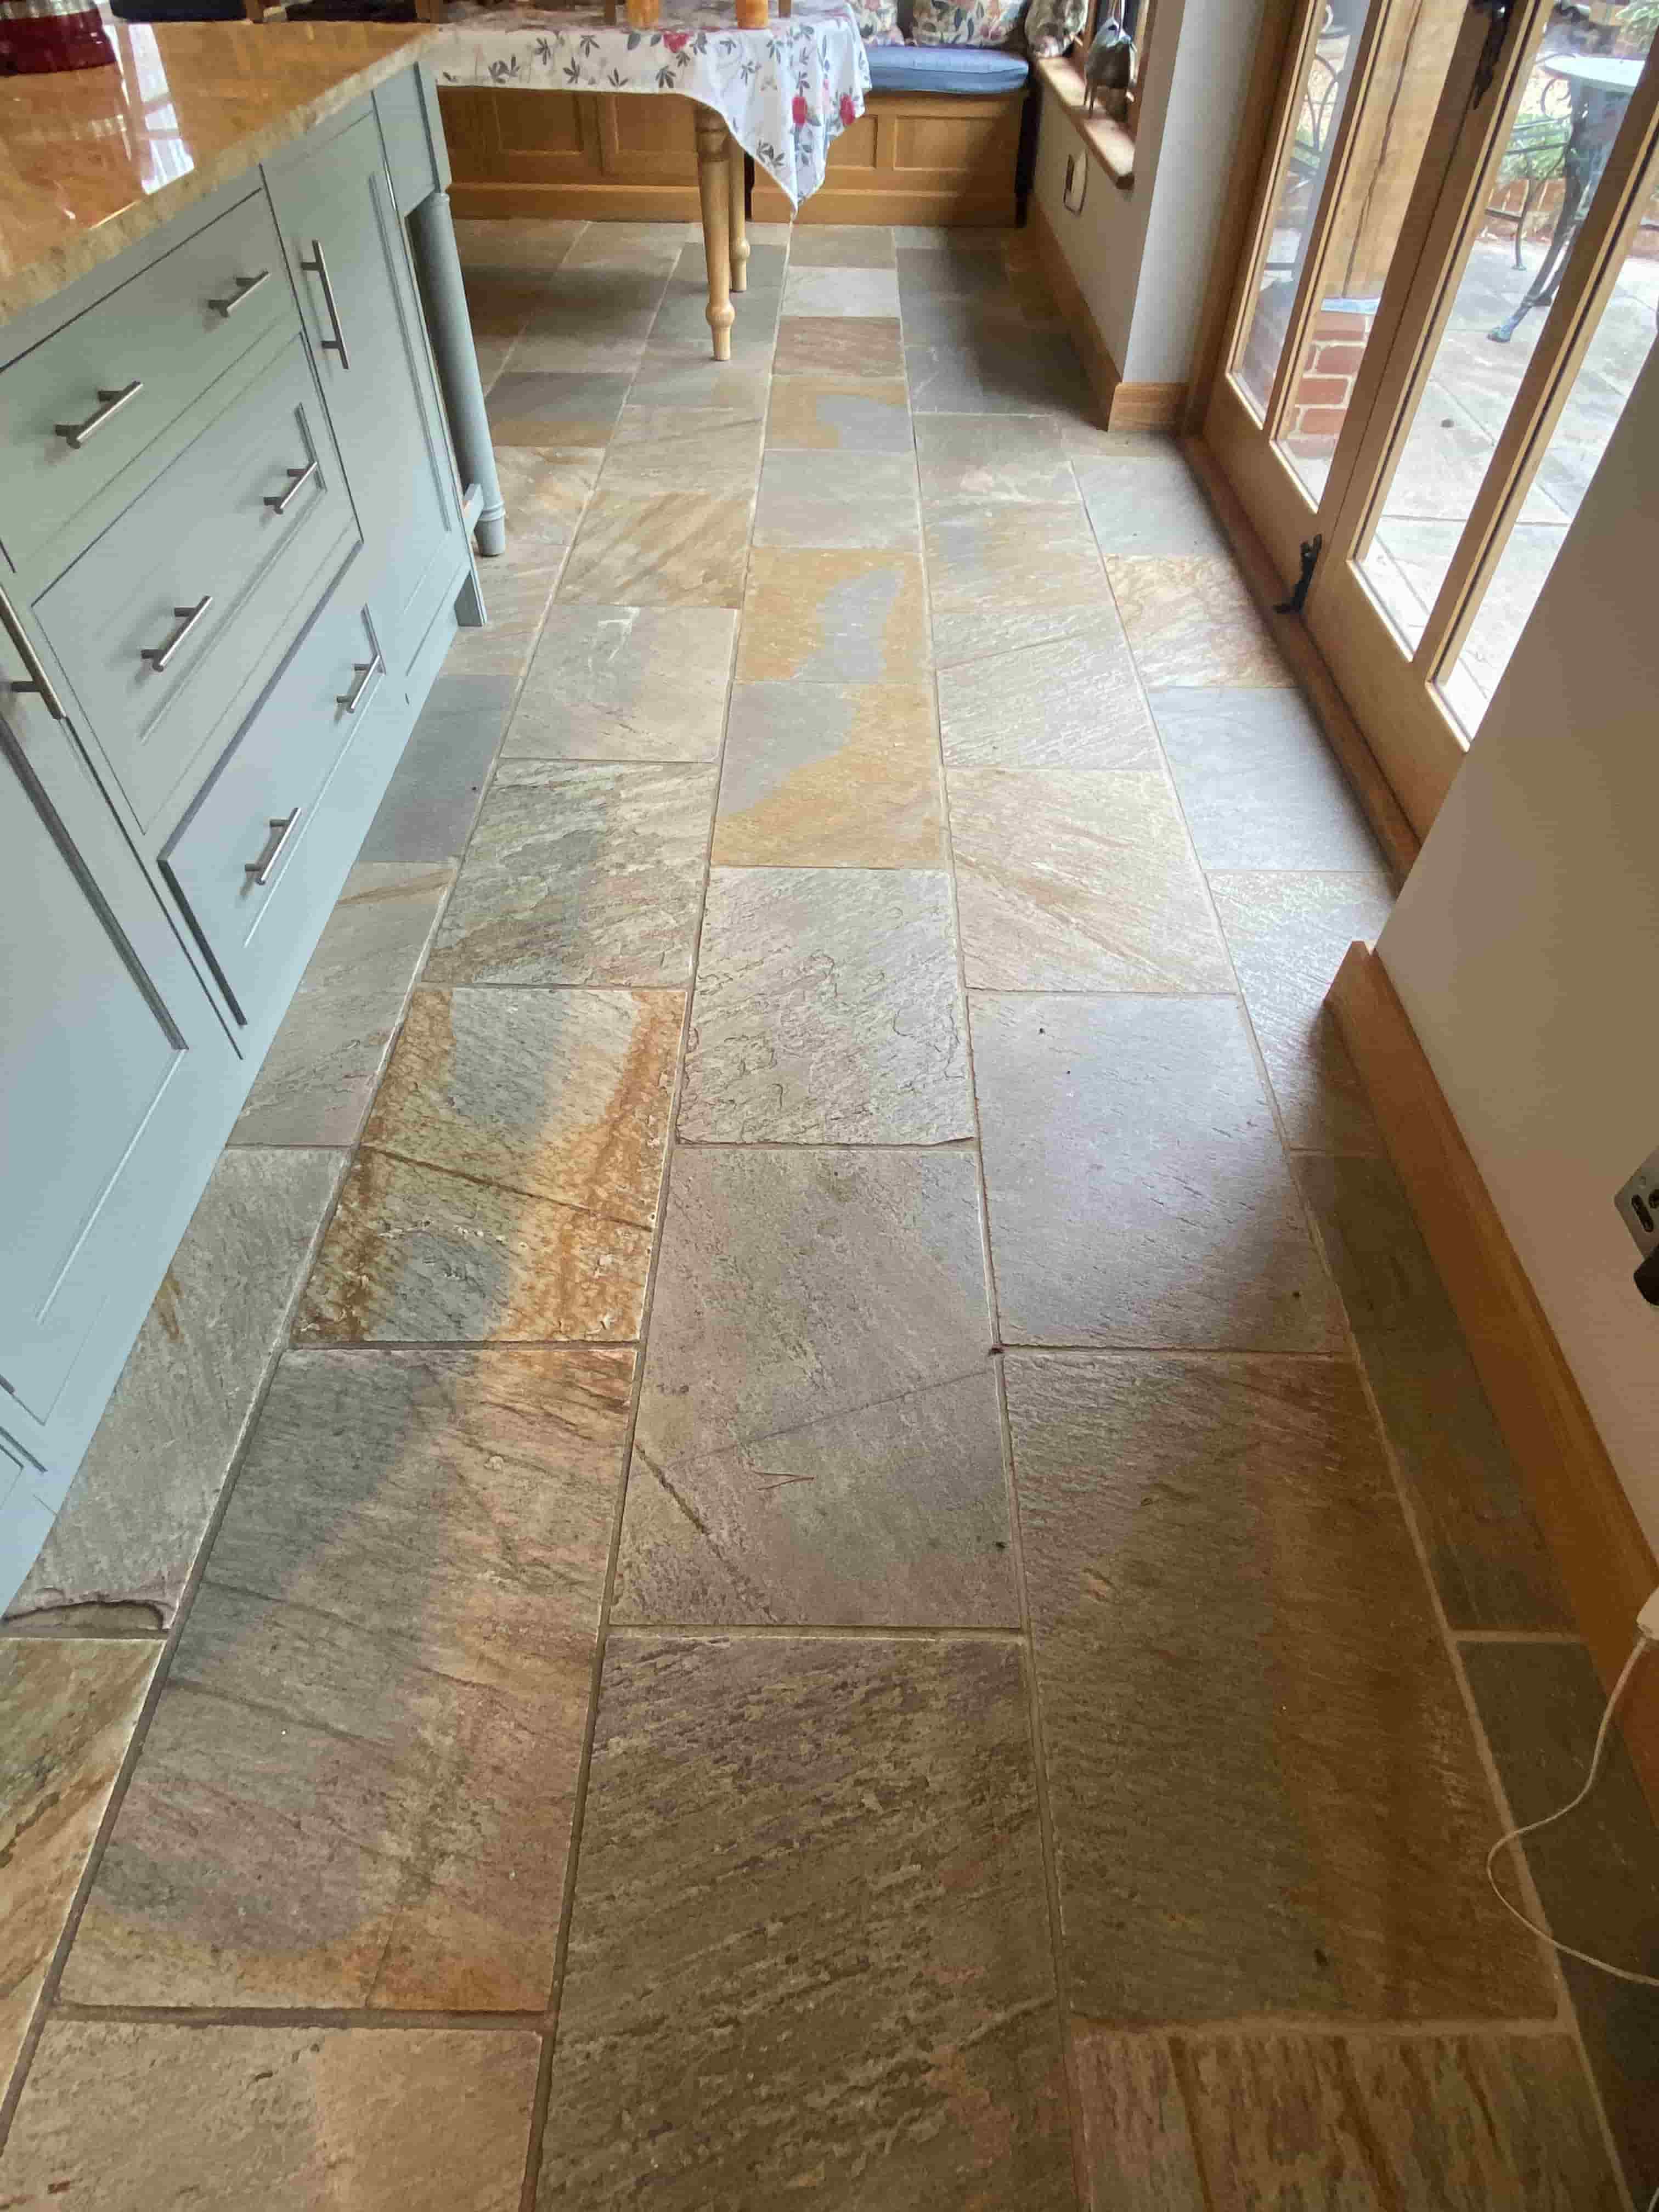
Multi-coloured Slate Tiled Floor Before Cleaning West Wickham

I visited the property to measure the area and carried out a few patch tests to check the best process and from that I was able to provide an accurate quote for the work. Happy with the quote I got the go ahead and a mutually convenient time to do the work was agreed with the tenant. It was a large area so the work would be a little disruptive.

Deep Cleaning a Multi Coloured Slate Tiled Floor

To start I applied a strong dilution of Tile Doctor Remove and Go, left it to soak in for ten minutes and then scrubbed the floor with a black scrubbing pad fitted to rotary machine. This action brought a lot of the ingrained dirt to the surface where I was able to remove it using our van mounted cleaning system that applies pressurised water to the floor whilst simultaneously extracting the soiled water to a tank in the van via a vacuum. This keeps the mess to a real minimum and improves drying times.

The tiles and especially the grout was very dirty and it was necessary to repeat this process a few times, hand scrubbing where necessary until I was satisfied the Slate and Grout was as clean as possible. It was a large area so I had to work in sections until all the floors were complete and once done it was left to dry off overnight.

Sealing a Multi Coloured Slate Tiled Floor

Returning the following morning work started by taking several moisture readings from each area with a damp meter to ensure the tiles were dry and ready for sealing. The readings were fine so the first of several coats of Tile Doctor Ultra Seal was applied. This sealer is almost invisible and so doesn’t affect the look of the stone leaving it with a completely natural finish.

Multi-coloured Slate Tiled Floor After Cleaning West Wickham

The client and tenant were very happy with the end result and have ordered some Tile Doctor Neutral Cleaner for the regular cleaning of the stone. Using our cleaner which is pH neutral will ensure the newly applied sealer is not compromised and will keep the floor in tip top condition particularly in the heavy traffic areas.

Multi-coloured Slate Tiled Floor After Cleaning West Wickham


Professional Clean and Seal of a Multi-Coloured Slate Floor in Cambridgeshire

Multi Coloured Slate floor in desperate need of a deep clean West Wickham Read More »

Quarry Tiled Kitchen Floor Before After Restoration Godmanchester

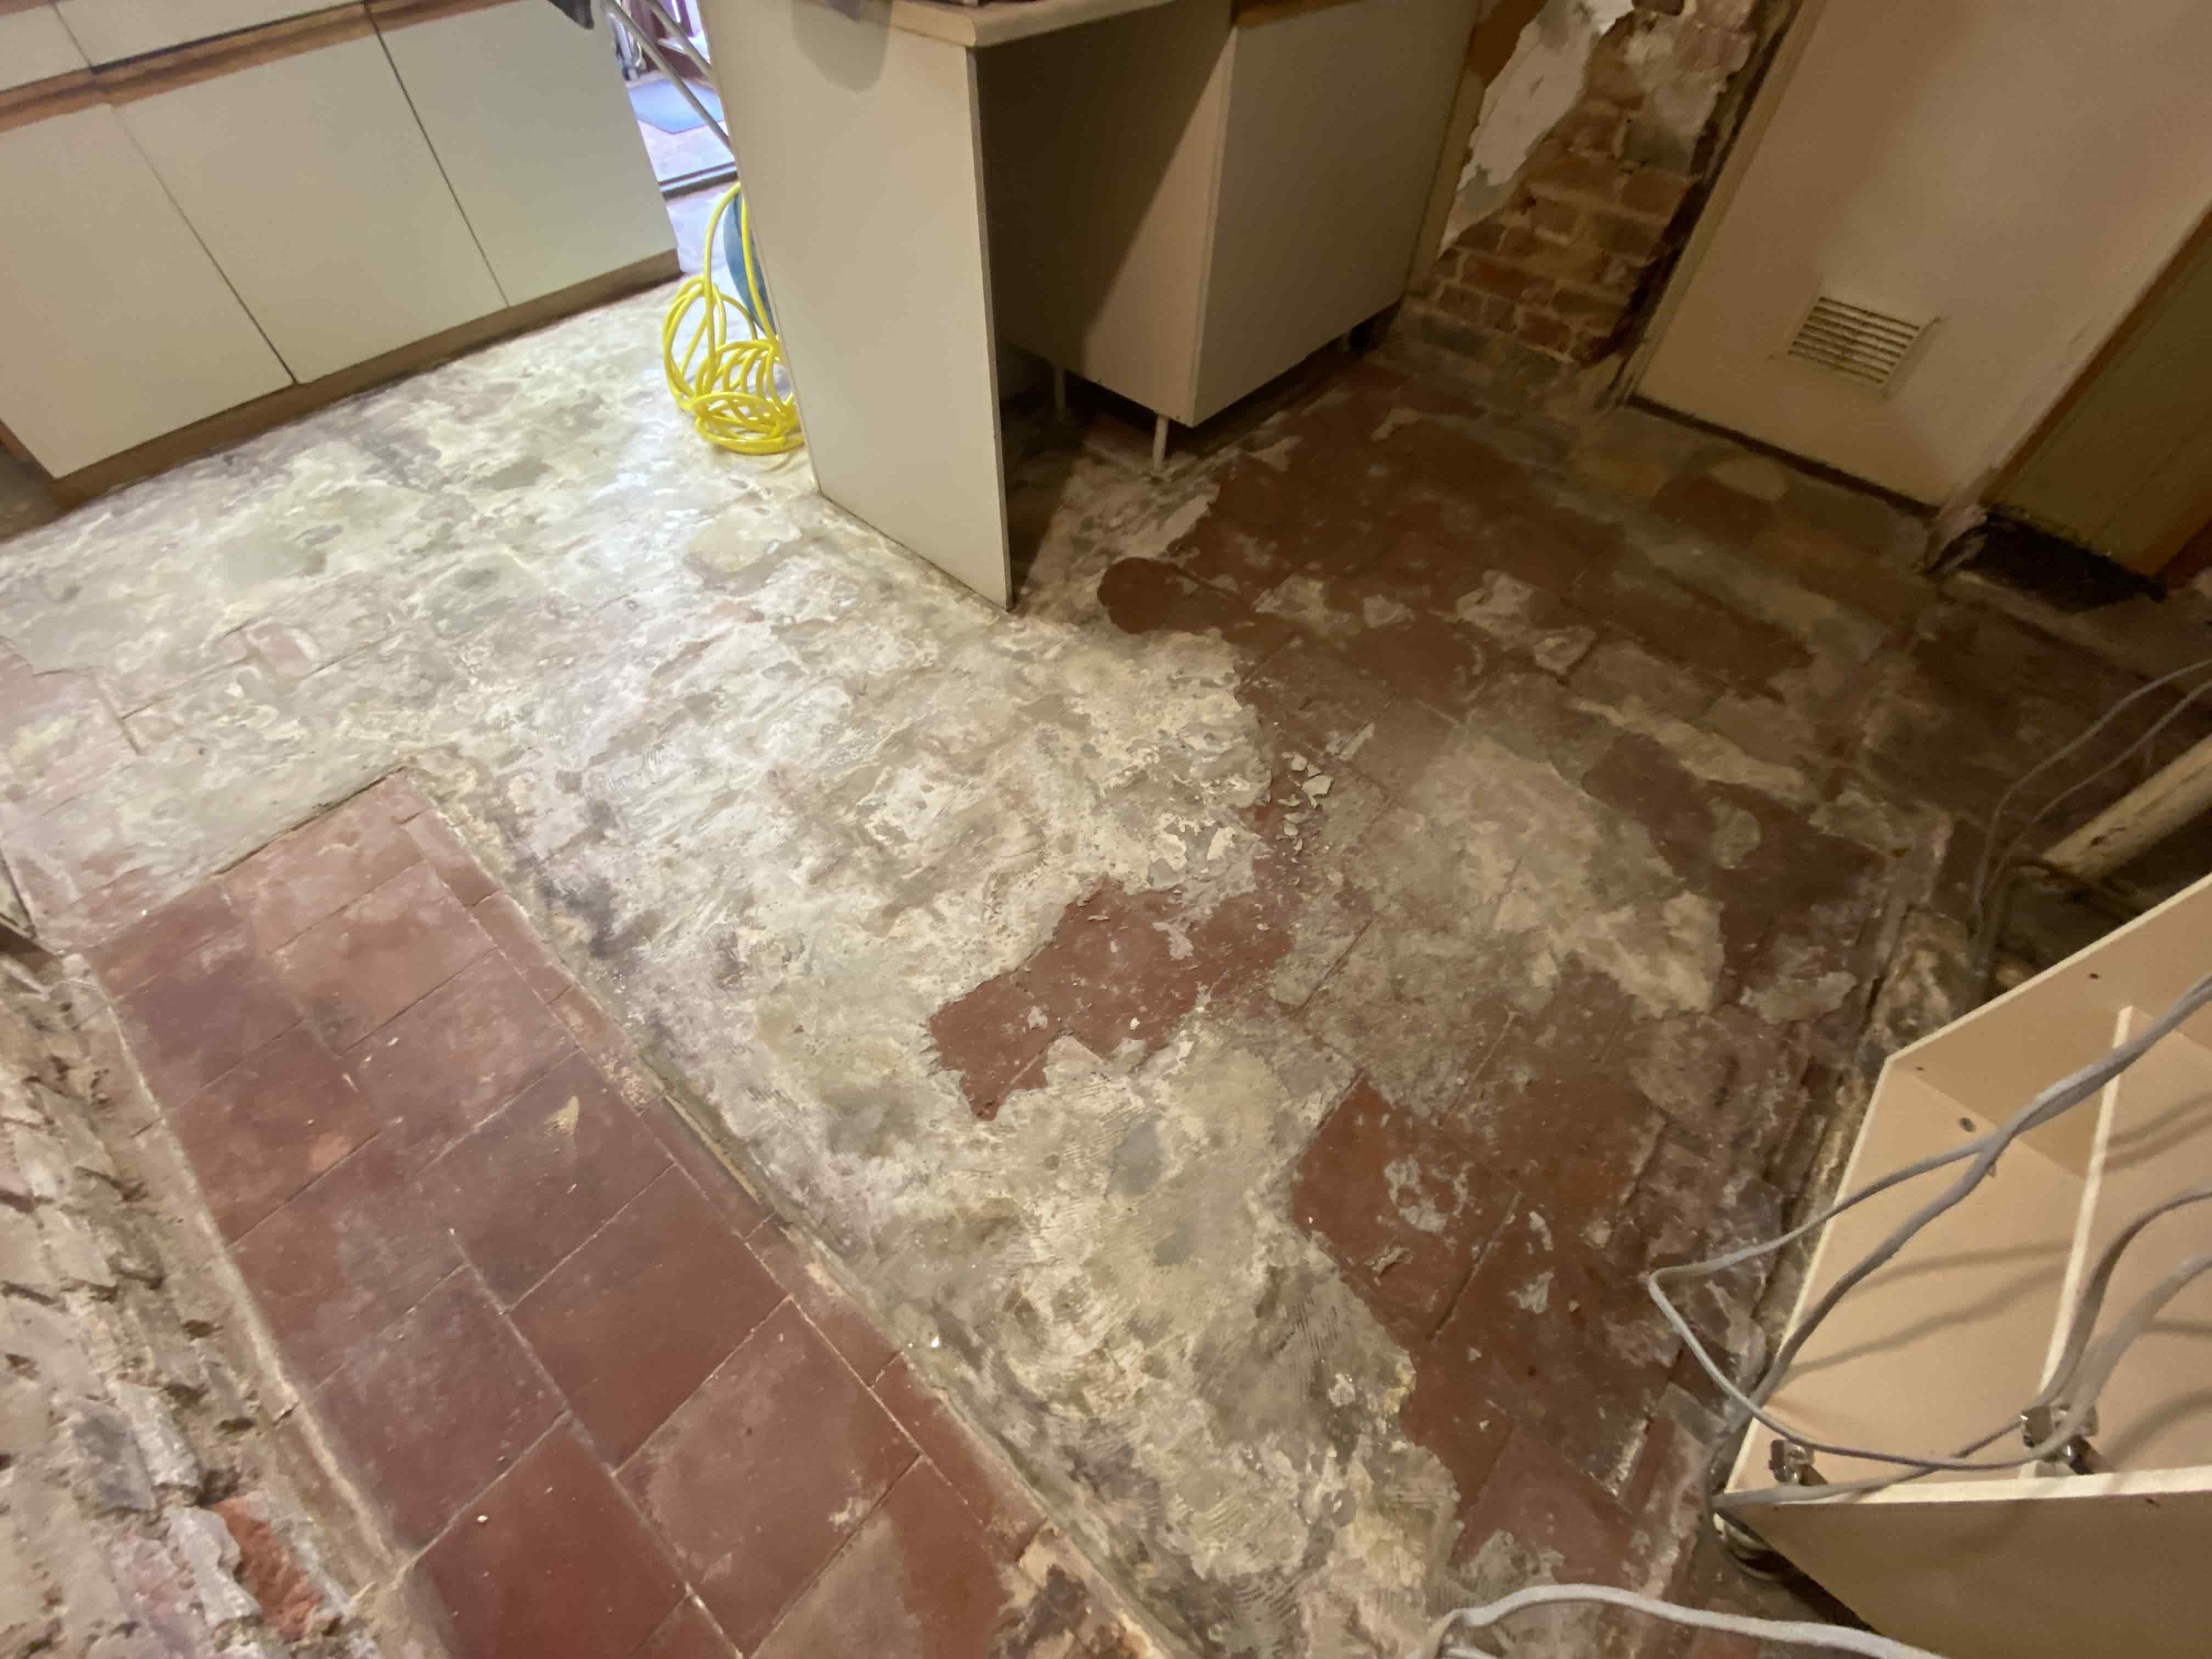
Removing Screed and Adhesive from Kitchen Quarry Tiles in Godmanchester

We received a call from a repeat client in the historic town of Godmanchester who needed help with a Quarry tiled Kitchen floor. The property had several period features that were to be kept as part of the restoration project. In fact, we had been out to the property before having restored the brick hallway floor, Victorian tiled dining room floor and fireplace quarry tiles. It’s always nice to return to previous clients and is testament to how satisfied they are with our previous work. The project was progressing and this time it was the kitchen floor that needed restoration.

Quarry Tiled Kitchen Floor Before Screed Removal Godmanchester

The kitchen Quarry tiles were in quote a state, with adhesive and screed poured over the surface from a previous occupant who had put down vinyl over the tiles. The current owner had managed to remove the vinyl but was unsure how to tackle the screed and adhesive, so we were asked to do the work. I ran some tests to work out the best way to approach the job and once I was satisfied, I was able to give them a price for the work. They were happy to go ahead so we arranged a mutually convenient time.

Cleaning Cement Screed and Glue off Kitchen Quarry Tiles

This was one of the hardest removals I can remember doing and, in the end, it took two and a half days of hard work to complete. I used an air powered needle gun and scrappers to remove the majority of screed and glue from the affected area but still had to resort to hammer and chisel in places.

Quarry Tiled Kitchen Floor Before Screed Removal Godmanchester

To further clean up the tiles I then scrubbed the tile and grout with a strong dilution of Tile Doctor Remove and Go and Tile Doctor Acid Gel which was worked in together and then rinsed with water. The resultant soiling was then extracted using a wet vacuum. This process was repeated until I was satisfied the floor was as clean as it could be.

Sealing a Quarry Tiled Kitchen Floor

With no one living at the property the heating was not turned on and so I left the floor for a week to give it time to dry out. Also, on my return I tested the tiles with a damp meter to be 100% sure it was ready to take a sealer.

Given the age of the property we selected to seal the floor using Tile Doctor X-Tra Seal. The client didn’t want a high sheen finish, so this was the perfect solution. It’s a breathable impregnating sealer which is hardwearing and ideal for busy areas such as the kitchen. The first coat revived the colour and the second coat, added a nice subtle sheen finish.

Quarry Tiled Kitchen Floor After Screed Removal Godmanchester

My client was very pleased with the floor transformation and I was able to complete the restoration in time for the installation of new kitchen units the following month.

For aftercare cleaning I recommended the use of Tile Doctor Neutral Tile Cleaner, which is a gentle but effective pH neutral tile and grout cleaning product. This will keep the floor looking in great condition and ensure the newly applied seal retains its integrity.

Quarry Tiled Kitchen Floor After Restoration Godmanchester


Professional Restoration of a Quarry Tiled Kitchen in Cambridgeshire

Removing Screed and Adhesive from Kitchen Quarry Tiles in Godmanchester Read More »

Pale Porcelain Tiled Kitchen Floor Before After Grout Haze Removal Winwick

Cleaning up Grout Haze on a new Porcelain Patio in Winwick

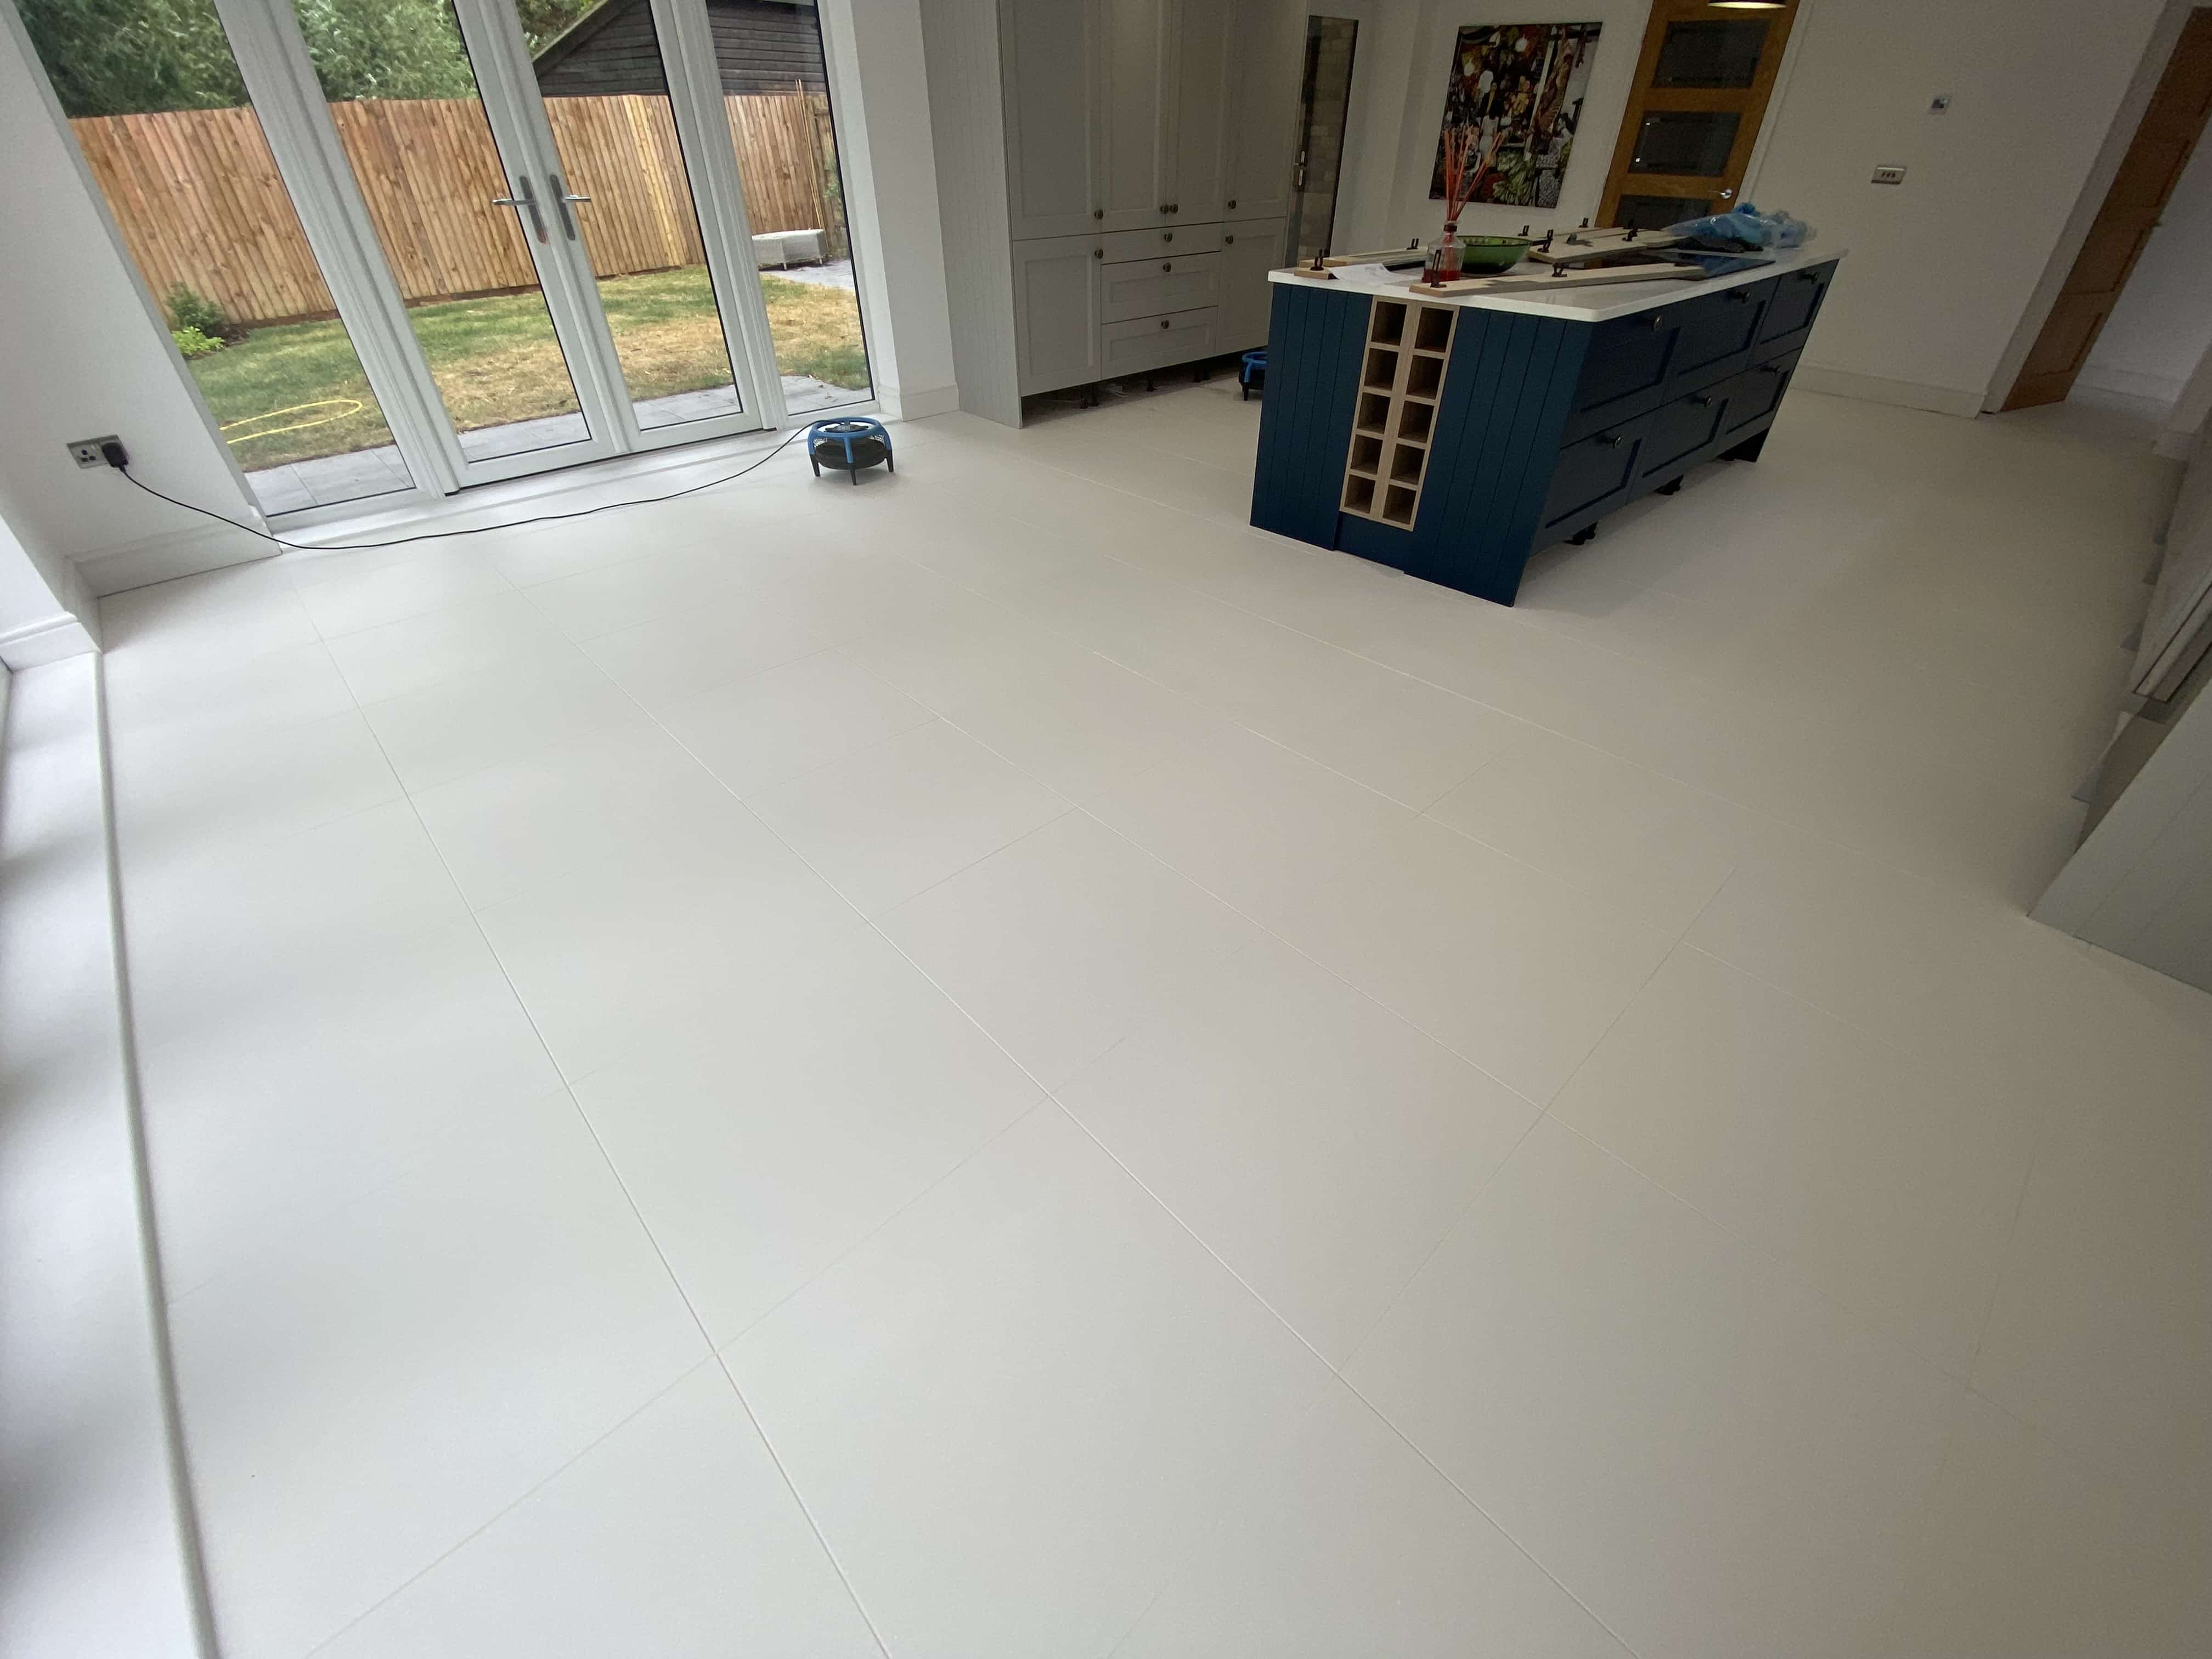
I was called out to clean a Porcelain tiled floor at a newly built property in Winwick near Huntingdon. The tiles were heavily marked with grout and dirt and were impossible to get clean. To make things worse the tiles were pale, almost white, in colour which made the staining more obvious. It was clear to me that the builder had not managed to polish off all the grout after tiling and this had now set hard on the surface.

Pale Porcelain Tiled Kitchen Floor Before Grout Haze Removal in Winwick Huntingdon

This is a very common problem known as Grout Haze and fortunately there is a solution, in that it can be removed by giving the tiles a rinse with an acidic tile cleaner called Tile Doctor Grout Clean-up. To prove the point, I carried out a quick demonstration so the new owners could appreciate the difference.

Pale Porcelain Tiled Kitchen Floor Before Grout Haze Removal in Winwick Huntingdon

I always like to test porcelain tiles for a reaction to acid prior to commencing work as acidic cleaners can have a negative effect on some types of polished porcelain however this one had a textured feel to it so there was no issue.

Removing Grout Haze from Pale Porcelain Kitchen Tiles

The test went well so having got the go head I began by first cleaning the tiles with a medium dilution of Tile Doctor Pro-Clean, this was left for about ten minutes before being worked into the tile with a black scrubbing pad fitted to a rotary machine. I also used a stiff brush along the grout lines to make sure the grout was as clean as the tile.

This process generates a lot of soiling which was then extracted using a truck mount machine. By Truck Mount I’m referring to a powerful cleaning machine that’s fitted into my van, it blasts the floor with hot water and then immediately extracts it using an equally powerful vacuum to grey tank in the vehicle, it’s incredibly effective and leaves very little water on the floor afterwards.

The next step was to tackle the grout haze and this is done as before by Acid Washing the floor using a dilution of Tile Doctor Grout Clean-up and scrubbing into the tile as before. Again, the resultant soils were extracted as before using the truck mount.

Sealing Pale Porcelain Kitchen Tiles and Grout

The floor was then speed dried using Dripods which are small horizontal fans designed to blow air downwards and ideal for drying carpets and hard floors. Once dry, a coat of Tile Doctor Ultra-Seal was applied, left to dry and any excess buffed away with a White pad.

Pale Porcelain Tiled Kitchen Floor After Grout Haze Removal in Winwick Huntingdon

The work was completed in one day and completely transformed the floor much to the delight of my customer who left the following message in a subsequent email:

“Thank you very much indeed, we are delighted with the floor.”

Pale Porcelain Tiled Kitchen Floor After Grout Haze Removal in Winwick Huntingdon

I’m pleased to say I have since returned to the neighbourhood and completed another identical grout removal job at a neighbour’s property who had the same issue with builder.


Professional Renovation of a Porcelain Tiled Floor in Cambridgeshire

Cleaning up Grout Haze on a new Porcelain Patio in Winwick Read More »

Pale Limestone Floor Before and After Renovation Toft

Cleaning a Stunning Pale Limestone Hallway Floor in Toft

This job was for a repeat client in Toft near Cambridge who had aa stunning large hallway that was tiled in beautiful pale Limestone. My client had asked me back to work on the floor having previously completed the deep clean and seal of a Terracotta floor previously.

Polished Limestone Floor Before Cleaning Toft

The Limestone tiling in the entrance hall had years of some type of topical sealer applied to it. This caused the stone to look slightly discoloured and from certain lights showed up hundreds of scratches and smudges embedded in the seal. I’ve tried to capture this problem in the photographs on this page, but it was very difficult.

Polished Limestone Floor Before Cleaning Toft Polished Limestone Floor Before Cleaning Toft

A topical sealer sits on the surface of the tile where it is vulnerable to scratching, hallways are generally high traffic areas and so more likely to see this sort of problem. Ideally an impregnating sealer should have been applied, impregnators work by occupying the pores in the stone thus preventing soiling from becoming ingrained in the stone.

Cleaning a Limestone Tiled Hallway Floor

Before starting we protected the woodwork against splashing with blue film, I don’t usually make a great deal of mess, but you can never be too careful when working in someone’s property especially one as beautiful as this.

To strip off the old sealer I began by applying a strong dilution of Tile Doctor Remove and Go to the Limestone tiles. I split the floor into sections and used a 400-grit diamond burnishing pad to work the Tile Doctor Remove and Go into the tiles. The floor was then rinsed off using our high-pressure cleaning system that applies pressurised hot water to the floor whilst simultaneously extracting the soil with its built-in vacuum. The system is quite heavy, so it is built into my van, and I run a large flexible hose to a spinner tool that does the cleaning. It is an expensive tool, but it saves a lot of time and leaves the floor fairly dry afterwards.

The 400-grit pad had released a lot of the sealer but there were quite a few layers to get through, so I changed the burnishing pad to a coarse 200-grit pad and repeated the process. After another rinse and extract I would see it had the desired effect and I was able to carry on building up the finish on the Limestone by apply the 400-grit followed by the 800, 1500 grit pads. It was a large floor and so this took up much of the day so once complete I left for the day so it could dry off overnight.

Sealing a Limestone Tiled Hallway Floor

The next day I finished the polishing process with the application of a 3000-grit burnishing pad which is applied with a little water sprayed onto the tile and really brings up the polish on the stone. This process has the added advantage of leaving the floor dry so not long afterwards I was able to move on to sealing.

For this floor two coats of Tile Doctor Ultra-Seal were applied, it is an impregnating sealer that won’t alter the colour of the tiles leaving a natural look.

Polished Limestone Floor After Cleaning Polishing Toft

My client was much happier with the new finish and has asked for another quotation on some more Terracotta flooring that needs attention. For aftercare I recommend using Tile Doctor stone soap, it’s a special formula that builds on the patina which will help maintain the polished appearance of the Limestone.

Polished Limestone Floor After Cleaning Polishing Toft Polished Limestone Floor After Cleaning Polishing Toft


Professional Restoration of a Limestone Tiled Hallway in Cambridgeshire

Cleaning a Stunning Pale Limestone Hallway Floor in Toft Read More »

Porcelain Patio Grout Stain Removal Ely

Cleaning up Grout Haze on a new Porcelain Patio in Ely

Earlier this summer I was called out to this job in the garden of a house in the city of Ely to inspect a freshly laid porcelain tiled patio with grout haze issues. The builder who had installed the patio hadn’t removed all the grout from the textured surface of the tile before it had dried. This was probably due to the hot weather which reduces drying times and has caught many tilers out. Multiple repeat visits by the builder trying followed who spent countless hours trying to remove the grout haze, unfortunately due to the textured surface of the tile he was unable to remove it and the patio was left looking awful.

Porcelain Patio Ely Before Grout Haze Removal

Like the builder we are increasingly finding modern grouts, which although more durable, are very difficult to remove. Fortunately belonging to the Tile Doctor network, I had already been made aware of this problem and was able to offer a solution.

I arranged to pay the property a visit to demonstrate a potential solution and quote for resolving the issues. Even though the grout haze was indeed difficult to remove it wasn’t impossible if you know how. The demonstration came out well and relieved that they had finally found a solution to the problem booked me in to get the work carried out.

Cleaning a Porcelain Tiled Patio Floor

On my return I started with the application of a strong dilution of Tile Doctor Grout Clean-Up. This product is ideal for removing grout haze or smears as they often referred to; however, being acidic we don’t recommend it for use on every surface so if your using it yourself do check the label first. I left it to soak in for ten minutes before being agitated with a black scrubbing pad fitted to a rotary buffer

The weather was good, so it wasn’t a problem working outside and once all the grout smears were removed, I finished off by giving the whole patio a high-pressure rinse. I use a van mounted rinse/extraction system for this that applies warm water at high pressure onto the patio to dislodge dirt and then extracts the waste into a separate tank in the vehicle. It was an expensive investment but makes light work of jobs like this.

It took around four to five cleans to complete the job, by the late afternoon the grout haze was gone, and the porcelain patio looked completely transformed. It was quite a warm day, so the patio soon dried allowing my client to use it later that day. I should mention that this variety of Porcelain tiles were not the micro porous type and therefore did not need to be sealed.

Porcelain Patio Ely After Grout Haze Removal

Relieved the problem was finally resolved and happy with the result my client left the following feedback:

Amazing service, they were able to provide us with a quote and demo before we agreed to work. We are so happy with the results we have as our patio slabs looked ruined to the eye but the Tile Doctor managed to get them looking brand new.


Professional Renovation of a Porcelain Tiled Patio in Cambridgeshire

Cleaning up Grout Haze on a new Porcelain Patio in Ely Read More »

Cream Limestone Floor Before After Refurbish Cambridge

Cream Limestone Floor Refurbished in Cambridge

The pictures below are of a Cream Limestone floor that I was recently asked to renovate in Cambridge. Limestone tile had been installed throughout much of the ground floor and due to the original sealer wearing off it had started absorbing dirt into the pores of the stone. This is an inevitable problem with natural stone and once ingrained with dirt the tiles looked permanently dirty despite the efforts of the owner to clean them.

Cream Limestone Floor Before Cleaning Cambridge

Having visited the property to survey the floor, I discussed with the owner the process required to deep clean and polish the stone back to health. Happy with my quotation we agreed a date for the work to be carried out.

Cream Limestone Floor Before Cleaning Cambridge Cream Limestone Floor Before Cleaning Cambridge

Cleaning and Polishing a Large Limestone Tiled Floor

To renovate the stone back to its original condition it need to be honed with a series of floor burnishing pads from 400 through to 3000 grit. Some areas were worse than others especially those which had a heavy traffic flow, i.e. kitchen, hallway, and dining room. For those areas I dropped right down to a very coarse a 200-grit burnishing pad to really get into the pores of the stone before moving on to the 400-grit.

During the first stage of honing I also applied a dilution of Tile Doctor Remove and Go which was worked into the limestone with the burnishing pad. The process does generate a lot of soil which needs to be removed after each pad. For this I have a van mounted extraction system that applies hot pressurised water onto the floor and then simultaneously extracts the soil back into a collection tank using a vacuum. It is very efficient and saves a lot of time when cleaning a large floor like this, it also has the added benefit of keeping the floor reasonably dry and keeping the mess to a minimum.

Cream Limestone Floor During Cleaning Cambridge Cream Limestone Floor During Cleaning Cambridge

I progressed through the other pads including 400, 800 and 1500-grit using water to lubricate the burnishing process and the van mounted cleaning system to clean up afterwards. The last 3000 grit pad is applied using a little water sprayed onto the floor which is a process we call a spray burnish and really brings up the polish on the Limestone. With the pad being applied dry it also leaves the tile dry and ready for sealing.

Sealing a Limestone Tiled Ground Floor

Once the honing was complete, I did a quick test with the moisture meter to ensure the floor was dry enough to seal. Due to only using minimum water during the burnishing and the large area of the floor the areas I had started on were dry enough to seal. I applied multiple coats of Tile Doctor Colour Grow, this is an impregnating sealer which gives the floor protection and a nice sheen. Any excess sealer was buffed off with a red pad.

Cream Limestone Floor After Cleaning Cambridge Cream Limestone Floor After Cleaning Cambridge

During the work there were multiple trades working on the house, so in all the work took five days to complete. The client was extremely pleased with the final finish and our flexibility in working around the other tradesmen. He also left the following testimonial on the Tile Doctor feedback system.

“We cannot recommend Tom Conlon highly enough. Our indoor limestone floors hadn’t been attended to in 15 years and we are thrilled with the result. Our house is rejuvenated. Tom was always professional, punctual and accommodating over the five days the work took. We would definitely ask him back for any other work in the future. Thank you Tom.”

Cream Limestone Floor During Cleaning Cambridge


Professional Restoration of a Limestone Tiled Floors in Cambridgeshire

Cream Limestone Floor Refurbished in Cambridge Read More »

Scroll to Top