Cambridge Tile Cleaning

Cambridge Tile Cleaning

Welcome to my Work History archive where you will find examples of the cleaning and renovation of tiles carried out in Cambridge.

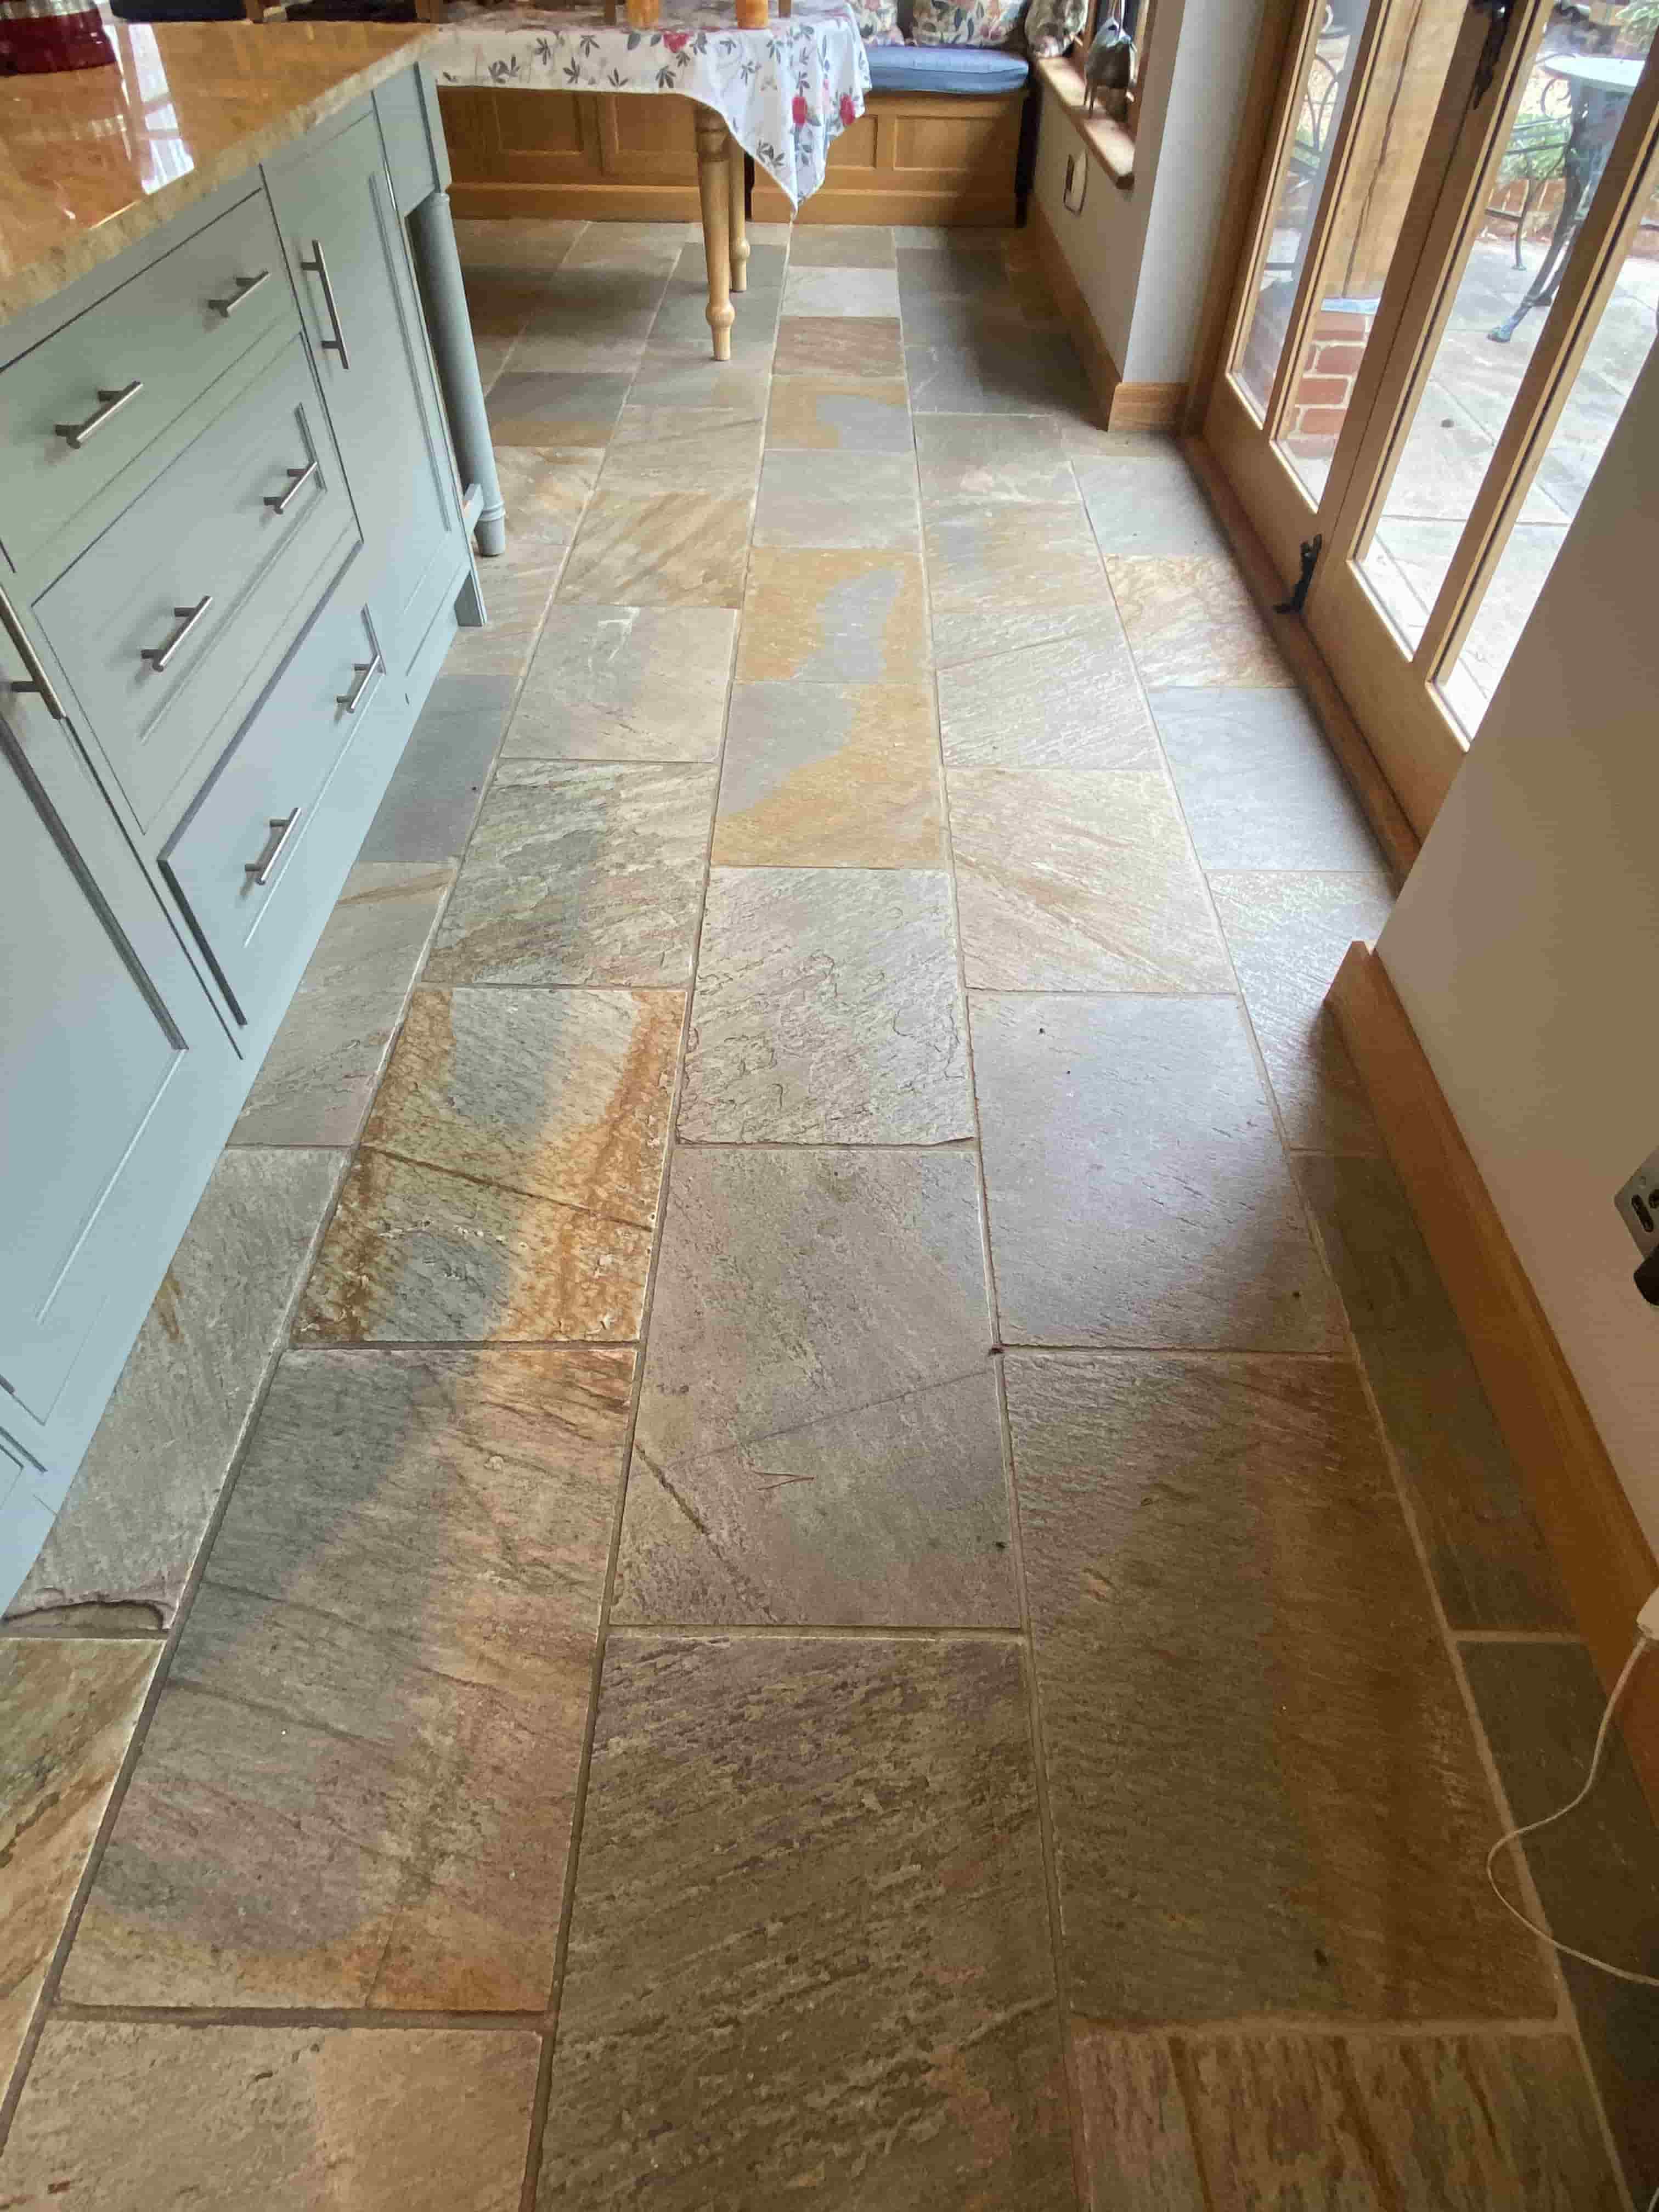
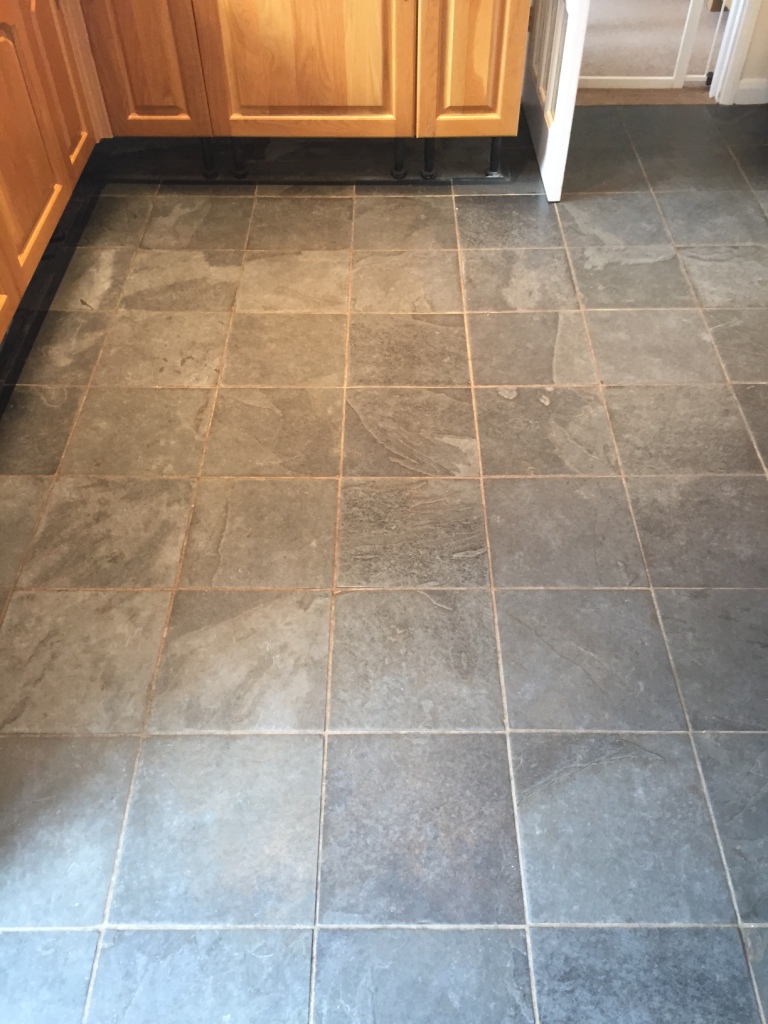
Slate Floor Cleaning and Sealing Burwell

Restorative Cleaning and Sealing of a Slate Flooring in Burwell

A client from the village of Burwell near Cambridge had recently moved into a property with a Slate tiled floor and was unhappy with its condition as it never looked clean. After discussing the problem over the phone, it was clear to me that the sealed has worn off and dirt was now lodged deeply in the pores of the stone making it difficult to clean.

Slate Floor Before Cleaning Burwell

The tiles were installed throughout much of the ground floor so there were several areas including the kitchen and living room that needed attention. Apart from the ingrained dirt the Slate floor was in good shape and just needed a deep clean and fresh sealer applied to renovate it.

Slate Floor Before Cleaning Burwell

I created a quote for a restorative clean and seal which was accepted, and a date agreed for the work to begin which should take two days, one to clean and then one to seal.

Deep Cleaning the Slate Tiled Floor

The first step to restore the stone was to remove what was left of the existing sealer. This is necessary to achieve a consistent finish as the wear on a sealer is always uneven due as the busiest areas wearing down first. To do this I sprayed each area of flooring with a dilution of Tile Doctor Remove and Go which is a coatings remover that is ideal for removing sealers, it’s also a powerful cleaning agent.

The Remove and Go was left to soak into the Slate tile for ten minutes before being worked in with a rotary machine fitted with a black scrubbing pad. The grout lines were also scrubbed at this point, this needs to be done manually with a stiff grout brush as the pads struggle to reach into the recesses of the grout lines. The resultant slurry was then rinsed away and extracted with a wet vacuum.

Last step before finishing for the day was to give the floor an acid wash using Tile Doctor Grout Clean-up. This cleans up the tiles by removing old grout smears that happen during installation and further cleans the stone.

After a final rinse and extraction with the wet vacuum the floor was left overnight to dry off.

Sealing Slate Floor Tiles

The next day I returned to apply a protective sealer checking first that the stone was dry using a moisture meter. We don’t recommend applying a sealer to a damp floor as this can lead to a patchy result.

Once satisfied the Slate was dry, multiple coats of Tile Doctor Seal and Go were applied. This is a water-based sealer (so no smell) that adds good stain protection and adds a nice subtle sheen to the tile which really enhanced the colours in the slate.

Slate Floor After Cleaning Sealing Burwell

The Slate floor was completely transformed by the work and my client was so impressed with the result they asked me to return and work my magic on their Travertine tiled bathroom.

Slate Floor After Cleaning Sealing Burwell

For aftercare cleaning of sealed Slate floors, I recommend the use of Tile Doctor Neutral Tile Cleaner which is a mild but effective tile cleaner. You need to be careful when choosing a cleaning product for sealed floors as many products are simply to strong and will erode the sealer prematurely.


Professional Renovation of a Slate Tiled floor in Cambridgeshire

Restorative Cleaning and Sealing of a Slate Flooring in Burwell Read More »

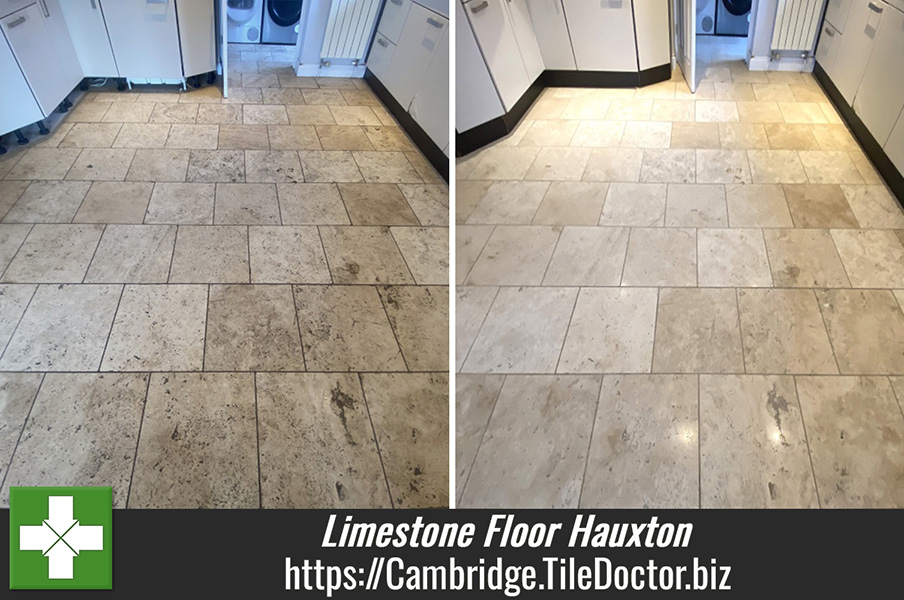
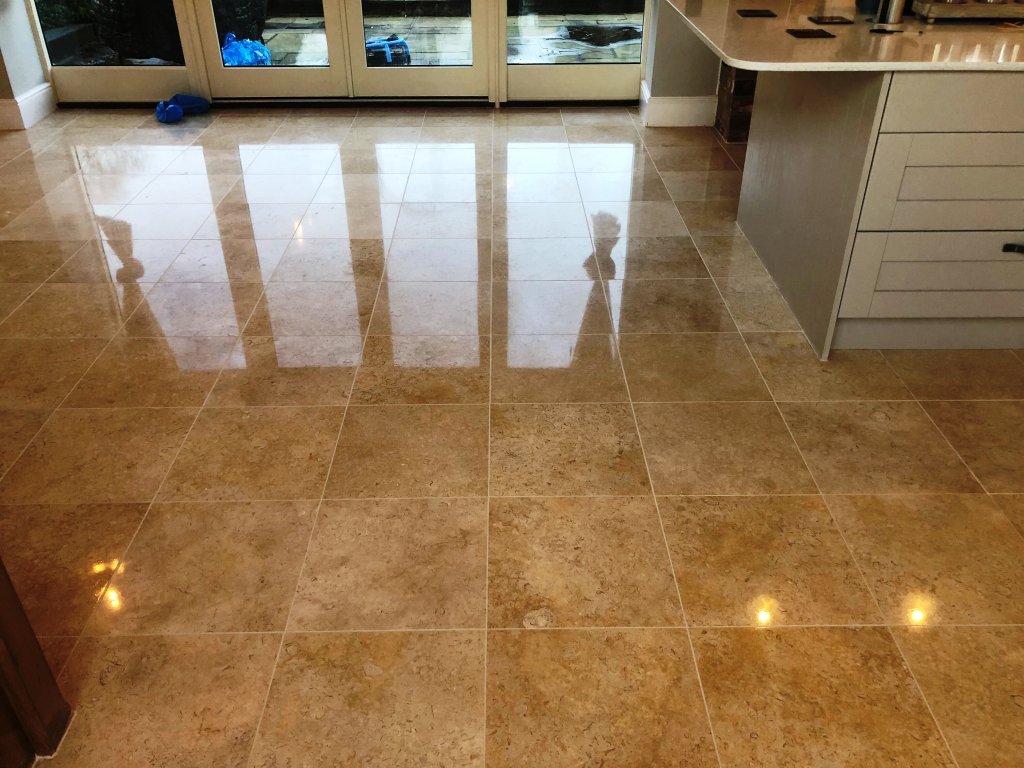
Limestone Floor Renovation Lode Cambridge

Heavily Soiled Limestone Floor Renovated in Lode Cambridge

I was contacted by a homeowner from the village of Lode near Cambridge about their beautiful Limestone floor that ran through most of the ground floor but mostly evident in the Kitchen.

The floor had not been deep cleaned and sealed for some years, and now with the sealer failing dirt was becoming lodged in the pores of the stone making it difficult to keep clean. What was once an attractive Limestone floor was now looking very grubby and un-appealing. The owner unhappy with its appearance asked if I could pop over and provide a price for renovating the floor.

Limestone Floor Before Cleaning Lode Cambridge

I went over to survey the tiles and provide a quote as requested. It was immediately clear to me that as suspected the sealer had definitely worn off and dirt was now building up in the pores of the stone where it’s difficult to shift. Whilst there I conducted a test clean of the floor so they could see the difference we could achieve and it was quite a contrast.

Limestone Floor Before Cleaning Lode Cambridge Limestone Floor Before Cleaning Lode Cambridge

Happy with the potential transformation I was booked to do the work and replace some grout that was missing in places.

Cleaning and Burnishing Limestone Tiles

Before beginning the restoration, I took the necessary precaution of covering the walls and kitchen units to protect them from exposure to cleaning products or mess.

Once that was done, I started the cleaning by applying Tile Doctor Remove and Go, which is a high-performance stripping and cleaning agent, to break down what was left of the sealer. This product can also be used to clean the stone itself, as well as the grout lines. I applied a strong dilution to the Limestone and grout lines and then let it soak in for ten minutes before scrubbing it in with a black pad fitted to a rotary buffer machine. Once done the soiling was rinsed away with water and removed with our high-pressure van mounted extraction system.

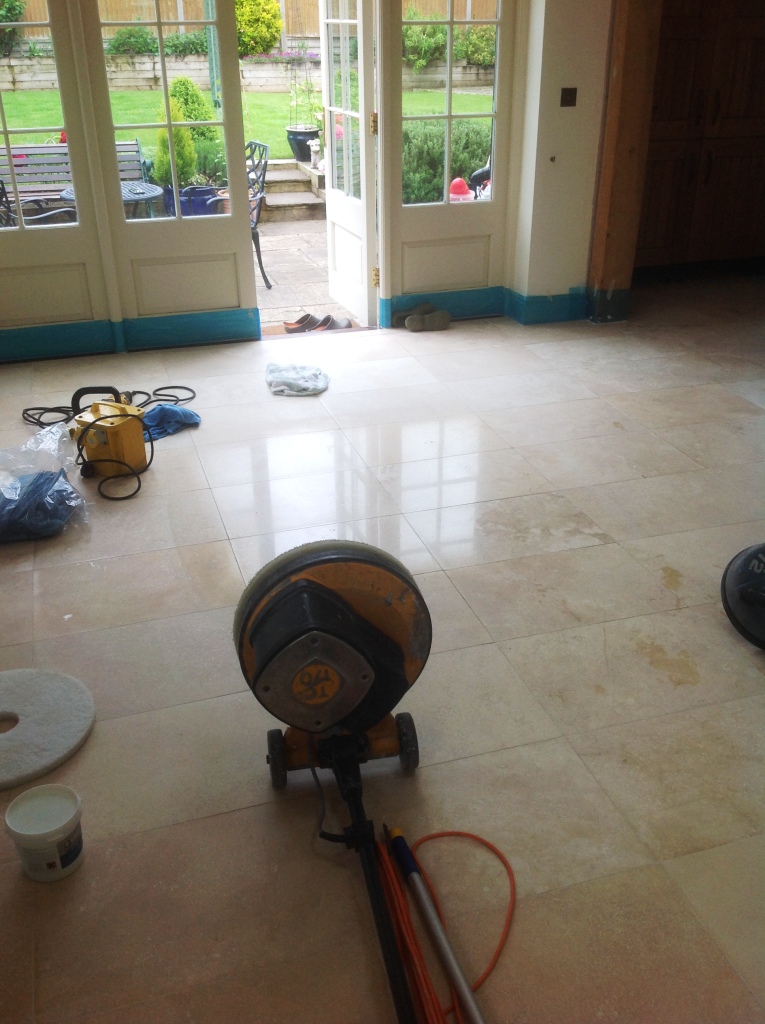
After completing the initial cleaning process, I moved on to restoring the polish to the tiles which we do with a set of diamond encrusted Burnishing Pads. Each pad has a different level of grit to grind away the dirt from the stone and build up the polished appearance. The process effectively resurfaces the stone leaving it looking new and fresh.

The process starts with the application of a coarse 400-grit pad, fitted to a rotary machine, to grind away any excess muck and sealant lubricated with a little water. The resultant slurry is rinsed away and I followed up with the application of the Medium 800 grit pad to start the restoration of the polish again with a small amount of water, followed by the Fine 1500 grit pad for the second polish.

Before finishing for the day, I regrouted those areas that needed attention and then left the floor to dry off overnight.

Sealing Limestone Tiles

The next day I started with the application of the last burnishing pad which is a very fine 3000-grit pad to achieve the most refined and highest quality polish possible. The process of burnishing is a gradual but highly effective means of achieving this kind of finish. This last pad is applied dry with only a little water sprayed onto the surface and leaves the floor dry.

The last step was to seal the floor and after discussing this with the owner previously it was clear they wanted the Limestone to keep its light appearance and so to seal the floor we used Tile Doctor Ultra Seal. This is a premium impregnating sealer that works by occupying the pores in the tile thereby preventing dirt from becoming lodged there.

Limestone Floor After Renovation Lode Cambridge Limestone Floor After Renovation Lode Cambridge

I completed the job just in time for Christmas 2022 and as you can see from the photos the Limestone was transformed. Needless to say, the client was extremely happy with the result and pleased the floor would be in good shape in time for the festivities.

For the regular cleaning of polished stone like this floor I recommend the use of Tile Doctor Stone Soap which is a gentle yet effective tile cleaner that helps maintain the patina.

Limestone Floor After Renovation Lode Cambridge


Professional Polishing of a Dull Limestone Tiled Floor in Cambridgeshire

Heavily Soiled Limestone Floor Renovated in Lode Cambridge Read More »

Slate Tiled Floor Cubicle Renovation West Wickham

Multi Coloured Slate floor in desperate need of a deep clean West Wickham

Having previously completed the restoration of a stone floor for this client in the village of West Wickham near Cambridge I was asked to return to look at the Multi-Coloured Slate tiles in the Kitchen of a rental property. The Slate floor had been laid throughout the Kitchen/Diner through to the Hallway and Utility room.

Multi-coloured Slate Tiled Floor Before Cleaning West Wickham

Over the years the sealer had worn down and dirt had become engrained in the pores of the Slate and had discoloured the grout. They were now in need of a deep clean and the tenant was pleased to be having the work done. It is always a delight to have an existing client have you back as there is no better testament of how happy they have been your work.

Multi-coloured Slate Tiled Floor Before Cleaning West Wickham

I visited the property to measure the area and carried out a few patch tests to check the best process and from that I was able to provide an accurate quote for the work. Happy with the quote I got the go ahead and a mutually convenient time to do the work was agreed with the tenant. It was a large area so the work would be a little disruptive.

Deep Cleaning a Multi Coloured Slate Tiled Floor

To start I applied a strong dilution of Tile Doctor Remove and Go, left it to soak in for ten minutes and then scrubbed the floor with a black scrubbing pad fitted to rotary machine. This action brought a lot of the ingrained dirt to the surface where I was able to remove it using our van mounted cleaning system that applies pressurised water to the floor whilst simultaneously extracting the soiled water to a tank in the van via a vacuum. This keeps the mess to a real minimum and improves drying times.

The tiles and especially the grout was very dirty and it was necessary to repeat this process a few times, hand scrubbing where necessary until I was satisfied the Slate and Grout was as clean as possible. It was a large area so I had to work in sections until all the floors were complete and once done it was left to dry off overnight.

Sealing a Multi Coloured Slate Tiled Floor

Returning the following morning work started by taking several moisture readings from each area with a damp meter to ensure the tiles were dry and ready for sealing. The readings were fine so the first of several coats of Tile Doctor Ultra Seal was applied. This sealer is almost invisible and so doesn’t affect the look of the stone leaving it with a completely natural finish.

Multi-coloured Slate Tiled Floor After Cleaning West Wickham

The client and tenant were very happy with the end result and have ordered some Tile Doctor Neutral Cleaner for the regular cleaning of the stone. Using our cleaner which is pH neutral will ensure the newly applied sealer is not compromised and will keep the floor in tip top condition particularly in the heavy traffic areas.

Multi-coloured Slate Tiled Floor After Cleaning West Wickham


Professional Clean and Seal of a Multi-Coloured Slate Floor in Cambridgeshire

Multi Coloured Slate floor in desperate need of a deep clean West Wickham Read More »

Pale Porcelain Tiled Kitchen Floor Before After Grout Haze Removal Winwick

Cleaning up Grout Haze on a new Porcelain Patio in Winwick

I was called out to clean a Porcelain tiled floor at a newly built property in Winwick near Huntingdon. The tiles were heavily marked with grout and dirt and were impossible to get clean. To make things worse the tiles were pale, almost white, in colour which made the staining more obvious. It was clear to me that the builder had not managed to polish off all the grout after tiling and this had now set hard on the surface.

Pale Porcelain Tiled Kitchen Floor Before Grout Haze Removal in Winwick Huntingdon

This is a very common problem known as Grout Haze and fortunately there is a solution, in that it can be removed by giving the tiles a rinse with an acidic tile cleaner called Tile Doctor Grout Clean-up. To prove the point, I carried out a quick demonstration so the new owners could appreciate the difference.

Pale Porcelain Tiled Kitchen Floor Before Grout Haze Removal in Winwick Huntingdon

I always like to test porcelain tiles for a reaction to acid prior to commencing work as acidic cleaners can have a negative effect on some types of polished porcelain however this one had a textured feel to it so there was no issue.

Removing Grout Haze from Pale Porcelain Kitchen Tiles

The test went well so having got the go head I began by first cleaning the tiles with a medium dilution of Tile Doctor Pro-Clean, this was left for about ten minutes before being worked into the tile with a black scrubbing pad fitted to a rotary machine. I also used a stiff brush along the grout lines to make sure the grout was as clean as the tile.

This process generates a lot of soiling which was then extracted using a truck mount machine. By Truck Mount I’m referring to a powerful cleaning machine that’s fitted into my van, it blasts the floor with hot water and then immediately extracts it using an equally powerful vacuum to grey tank in the vehicle, it’s incredibly effective and leaves very little water on the floor afterwards.

The next step was to tackle the grout haze and this is done as before by Acid Washing the floor using a dilution of Tile Doctor Grout Clean-up and scrubbing into the tile as before. Again, the resultant soils were extracted as before using the truck mount.

Sealing Pale Porcelain Kitchen Tiles and Grout

The floor was then speed dried using Dripods which are small horizontal fans designed to blow air downwards and ideal for drying carpets and hard floors. Once dry, a coat of Tile Doctor Ultra-Seal was applied, left to dry and any excess buffed away with a White pad.

Pale Porcelain Tiled Kitchen Floor After Grout Haze Removal in Winwick Huntingdon

The work was completed in one day and completely transformed the floor much to the delight of my customer who left the following message in a subsequent email:

“Thank you very much indeed, we are delighted with the floor.”

Pale Porcelain Tiled Kitchen Floor After Grout Haze Removal in Winwick Huntingdon

I’m pleased to say I have since returned to the neighbourhood and completed another identical grout removal job at a neighbour’s property who had the same issue with builder.


Professional Renovation of a Porcelain Tiled Floor in Cambridgeshire

Cleaning up Grout Haze on a new Porcelain Patio in Winwick Read More »

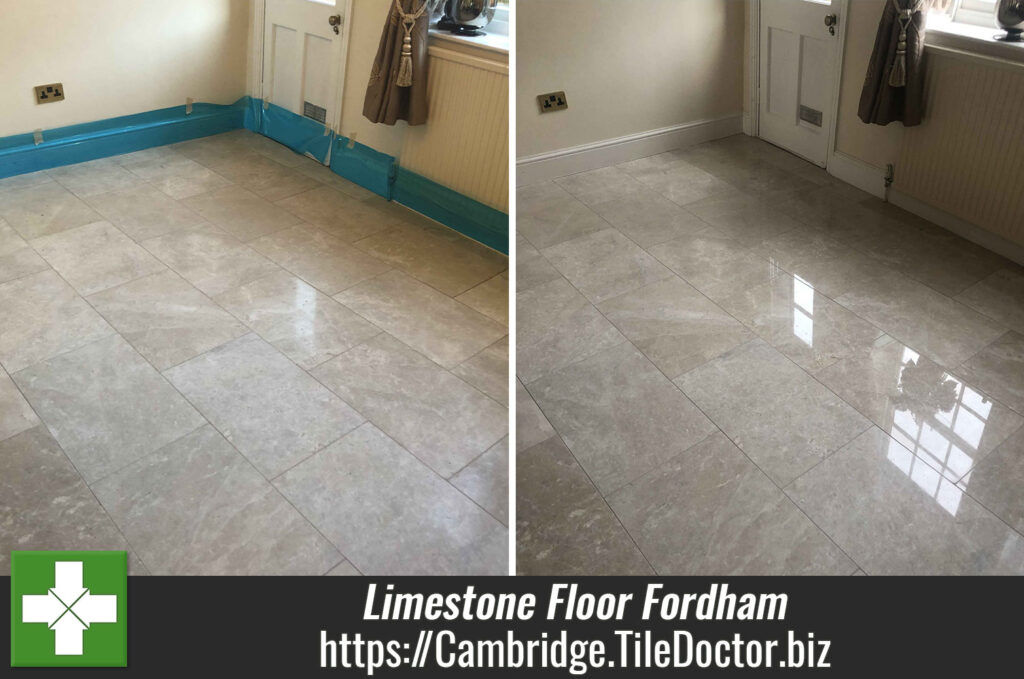
Limestone Floor Polished in Fordham Cambridge

Honing Limestone Flooring Before House Sale in Fordham Village

A client from Fordham on the outskirts of Cambridge called us in to renovate their polished Limestone flooring that ran throughout the ground floor. Years of general wear had made the stone lose it lustre and the client wanted it looking its best as they were looking to sell the property.

Large Limestone Floor Before Polishing Fordham WC Limestone Floor Before Polishing Fordham

Polished stone flooring does look incredible and gives any property a premium feel, however it does require regular maintenance if it’s to look its best. In fact, Tile Doctor offers a Maintenance Plan for floors like this one where we pop back once or twice a year to re-polish the stone with a high grit pad and top-up the sealer.

Without maintenance of this nature the polish will slowly wear down and eventually the sealer will fail allowing dirt to becoming ingrained in the stone and making it difficult to keep clean. The solution is to strip what’s left of the old sealer off the stone, bring up the polish using a set of diamond burnishing pads (Honing) and then re-seal and this is what I recommended for this Polished Limestone floor.

Kitchen Limestone Floor Before Polishing Fordham Large Limestone Floor Before Polishing Fordham

Cleaning and Honing a Polished Limestone Tiles

Before beginning the restoration, I took the usual precaution of covering the walls and kitchen units with thin blue plastic to protect them from exposure to any cleaning products or mess.

Working in the different areas one by one my first task was to give the Limestone a deep clean using a dilution of Tile Doctor Remove and Go, which is a coatings remover designed to break down any old sealant remaining on the tiles. This product is scrubbed in and then extracted, as well as removing the old sealer it also does a good job of cleaning the stone and grout. To extract the soils and clean the tiles afterwards I use a high-pressure hot water cleaning and extraction machine which is built into my van and keeps any mess to a minimum.

After completing the initial cleaning process, I moved on to honing the stone which slowly restores the polished appearance. This is done using a set of Diamond encrusted burnishing pads of different grits which slowly resurface the appearance of the Limestone tile removing scratches and other imperfections.

The process starts with the application of a coarse 400-grit pad, fitted to a rotary machine and is applied only with water to help lubricate the process. The resultant slurry is then rinsed away and the process repeated with a medium 800-grit pad again with water. At this point the polish on the stone starts to build and after another rinse and extraction is followed by a fine 1500-grit pad.

Finally, a very Fine 3000 grit pad is applied dry with only a little water sprayed onto the stone. The process of burnishing is a gradual but highly effective means of achieving this kind of finish.

Sealing Limestone Tiles

After burnishing the tiles and to achieve a really hard wearing and high polish I covered the floor in Tile Doctor Shine Powder crystals and buffed them into the Limestone tiles using a White buffing pad. Then to give the floor extra protection I applied a couple of coats of Tile Doctor Ultra-Seal, which soaks into the pores of the stone to prevent dirt from becoming ingrained there.

Large Limestone Floor After Polishing Fordham Kitchen Limestone Floor After Polishing Fordham

Ultra-Seal was chosen because it’s an invisible sealer which won’t affect the appearance of the Limestone resulting in a very natural appearance. You won’t realise its there until you spill something on the floor and then you will notice it pooling on the tiles to form a bubble that can be easily wiped off.

It took some time, but once completed the Limestone looked great with a really deep high shine that the light bounced off.

Large Limestone Floor After Polishing Fordham WC Limestone Floor After Polishing Fordham


Professional Polishing of a Dull Limestone Tiled Floor in Cambridgeshire

Honing Limestone Flooring Before House Sale in Fordham Village Read More »

Pale Limestone Floor Before and After Renovation Toft

Cleaning a Stunning Pale Limestone Hallway Floor in Toft

This job was for a repeat client in Toft near Cambridge who had aa stunning large hallway that was tiled in beautiful pale Limestone. My client had asked me back to work on the floor having previously completed the deep clean and seal of a Terracotta floor previously.

Polished Limestone Floor Before Cleaning Toft

The Limestone tiling in the entrance hall had years of some type of topical sealer applied to it. This caused the stone to look slightly discoloured and from certain lights showed up hundreds of scratches and smudges embedded in the seal. I’ve tried to capture this problem in the photographs on this page, but it was very difficult.

Polished Limestone Floor Before Cleaning Toft Polished Limestone Floor Before Cleaning Toft

A topical sealer sits on the surface of the tile where it is vulnerable to scratching, hallways are generally high traffic areas and so more likely to see this sort of problem. Ideally an impregnating sealer should have been applied, impregnators work by occupying the pores in the stone thus preventing soiling from becoming ingrained in the stone.

Cleaning a Limestone Tiled Hallway Floor

Before starting we protected the woodwork against splashing with blue film, I don’t usually make a great deal of mess, but you can never be too careful when working in someone’s property especially one as beautiful as this.

To strip off the old sealer I began by applying a strong dilution of Tile Doctor Remove and Go to the Limestone tiles. I split the floor into sections and used a 400-grit diamond burnishing pad to work the Tile Doctor Remove and Go into the tiles. The floor was then rinsed off using our high-pressure cleaning system that applies pressurised hot water to the floor whilst simultaneously extracting the soil with its built-in vacuum. The system is quite heavy, so it is built into my van, and I run a large flexible hose to a spinner tool that does the cleaning. It is an expensive tool, but it saves a lot of time and leaves the floor fairly dry afterwards.

The 400-grit pad had released a lot of the sealer but there were quite a few layers to get through, so I changed the burnishing pad to a coarse 200-grit pad and repeated the process. After another rinse and extract I would see it had the desired effect and I was able to carry on building up the finish on the Limestone by apply the 400-grit followed by the 800, 1500 grit pads. It was a large floor and so this took up much of the day so once complete I left for the day so it could dry off overnight.

Sealing a Limestone Tiled Hallway Floor

The next day I finished the polishing process with the application of a 3000-grit burnishing pad which is applied with a little water sprayed onto the tile and really brings up the polish on the stone. This process has the added advantage of leaving the floor dry so not long afterwards I was able to move on to sealing.

For this floor two coats of Tile Doctor Ultra-Seal were applied, it is an impregnating sealer that won’t alter the colour of the tiles leaving a natural look.

Polished Limestone Floor After Cleaning Polishing Toft

My client was much happier with the new finish and has asked for another quotation on some more Terracotta flooring that needs attention. For aftercare I recommend using Tile Doctor stone soap, it’s a special formula that builds on the patina which will help maintain the polished appearance of the Limestone.

Polished Limestone Floor After Cleaning Polishing Toft Polished Limestone Floor After Cleaning Polishing Toft


Professional Restoration of a Limestone Tiled Hallway in Cambridgeshire

Cleaning a Stunning Pale Limestone Hallway Floor in Toft Read More »

Porcelain Patio Grout Stain Removal Ely

Cleaning up Grout Haze on a new Porcelain Patio in Ely

Earlier this summer I was called out to this job in the garden of a house in the city of Ely to inspect a freshly laid porcelain tiled patio with grout haze issues. The builder who had installed the patio hadn’t removed all the grout from the textured surface of the tile before it had dried. This was probably due to the hot weather which reduces drying times and has caught many tilers out. Multiple repeat visits by the builder trying followed who spent countless hours trying to remove the grout haze, unfortunately due to the textured surface of the tile he was unable to remove it and the patio was left looking awful.

Porcelain Patio Ely Before Grout Haze Removal

Like the builder we are increasingly finding modern grouts, which although more durable, are very difficult to remove. Fortunately belonging to the Tile Doctor network, I had already been made aware of this problem and was able to offer a solution.

I arranged to pay the property a visit to demonstrate a potential solution and quote for resolving the issues. Even though the grout haze was indeed difficult to remove it wasn’t impossible if you know how. The demonstration came out well and relieved that they had finally found a solution to the problem booked me in to get the work carried out.

Cleaning a Porcelain Tiled Patio Floor

On my return I started with the application of a strong dilution of Tile Doctor Grout Clean-Up. This product is ideal for removing grout haze or smears as they often referred to; however, being acidic we don’t recommend it for use on every surface so if your using it yourself do check the label first. I left it to soak in for ten minutes before being agitated with a black scrubbing pad fitted to a rotary buffer

The weather was good, so it wasn’t a problem working outside and once all the grout smears were removed, I finished off by giving the whole patio a high-pressure rinse. I use a van mounted rinse/extraction system for this that applies warm water at high pressure onto the patio to dislodge dirt and then extracts the waste into a separate tank in the vehicle. It was an expensive investment but makes light work of jobs like this.

It took around four to five cleans to complete the job, by the late afternoon the grout haze was gone, and the porcelain patio looked completely transformed. It was quite a warm day, so the patio soon dried allowing my client to use it later that day. I should mention that this variety of Porcelain tiles were not the micro porous type and therefore did not need to be sealed.

Porcelain Patio Ely After Grout Haze Removal

Relieved the problem was finally resolved and happy with the result my client left the following feedback:

Amazing service, they were able to provide us with a quote and demo before we agreed to work. We are so happy with the results we have as our patio slabs looked ruined to the eye but the Tile Doctor managed to get them looking brand new.


Professional Renovation of a Porcelain Tiled Patio in Cambridgeshire

Cleaning up Grout Haze on a new Porcelain Patio in Ely Read More »

Cream Limestone Floor Before After Refurbish Cambridge

Cream Limestone Floor Refurbished in Cambridge

The pictures below are of a Cream Limestone floor that I was recently asked to renovate in Cambridge. Limestone tile had been installed throughout much of the ground floor and due to the original sealer wearing off it had started absorbing dirt into the pores of the stone. This is an inevitable problem with natural stone and once ingrained with dirt the tiles looked permanently dirty despite the efforts of the owner to clean them.

Cream Limestone Floor Before Cleaning Cambridge

Having visited the property to survey the floor, I discussed with the owner the process required to deep clean and polish the stone back to health. Happy with my quotation we agreed a date for the work to be carried out.

Cream Limestone Floor Before Cleaning Cambridge Cream Limestone Floor Before Cleaning Cambridge

Cleaning and Polishing a Large Limestone Tiled Floor

To renovate the stone back to its original condition it need to be honed with a series of floor burnishing pads from 400 through to 3000 grit. Some areas were worse than others especially those which had a heavy traffic flow, i.e. kitchen, hallway, and dining room. For those areas I dropped right down to a very coarse a 200-grit burnishing pad to really get into the pores of the stone before moving on to the 400-grit.

During the first stage of honing I also applied a dilution of Tile Doctor Remove and Go which was worked into the limestone with the burnishing pad. The process does generate a lot of soil which needs to be removed after each pad. For this I have a van mounted extraction system that applies hot pressurised water onto the floor and then simultaneously extracts the soil back into a collection tank using a vacuum. It is very efficient and saves a lot of time when cleaning a large floor like this, it also has the added benefit of keeping the floor reasonably dry and keeping the mess to a minimum.

Cream Limestone Floor During Cleaning Cambridge Cream Limestone Floor During Cleaning Cambridge

I progressed through the other pads including 400, 800 and 1500-grit using water to lubricate the burnishing process and the van mounted cleaning system to clean up afterwards. The last 3000 grit pad is applied using a little water sprayed onto the floor which is a process we call a spray burnish and really brings up the polish on the Limestone. With the pad being applied dry it also leaves the tile dry and ready for sealing.

Sealing a Limestone Tiled Ground Floor

Once the honing was complete, I did a quick test with the moisture meter to ensure the floor was dry enough to seal. Due to only using minimum water during the burnishing and the large area of the floor the areas I had started on were dry enough to seal. I applied multiple coats of Tile Doctor Colour Grow, this is an impregnating sealer which gives the floor protection and a nice sheen. Any excess sealer was buffed off with a red pad.

Cream Limestone Floor After Cleaning Cambridge Cream Limestone Floor After Cleaning Cambridge

During the work there were multiple trades working on the house, so in all the work took five days to complete. The client was extremely pleased with the final finish and our flexibility in working around the other tradesmen. He also left the following testimonial on the Tile Doctor feedback system.

“We cannot recommend Tom Conlon highly enough. Our indoor limestone floors hadn’t been attended to in 15 years and we are thrilled with the result. Our house is rejuvenated. Tom was always professional, punctual and accommodating over the five days the work took. We would definitely ask him back for any other work in the future. Thank you Tom.”

Cream Limestone Floor During Cleaning Cambridge


Professional Restoration of a Limestone Tiled Floors in Cambridgeshire

Cream Limestone Floor Refurbished in Cambridge Read More »

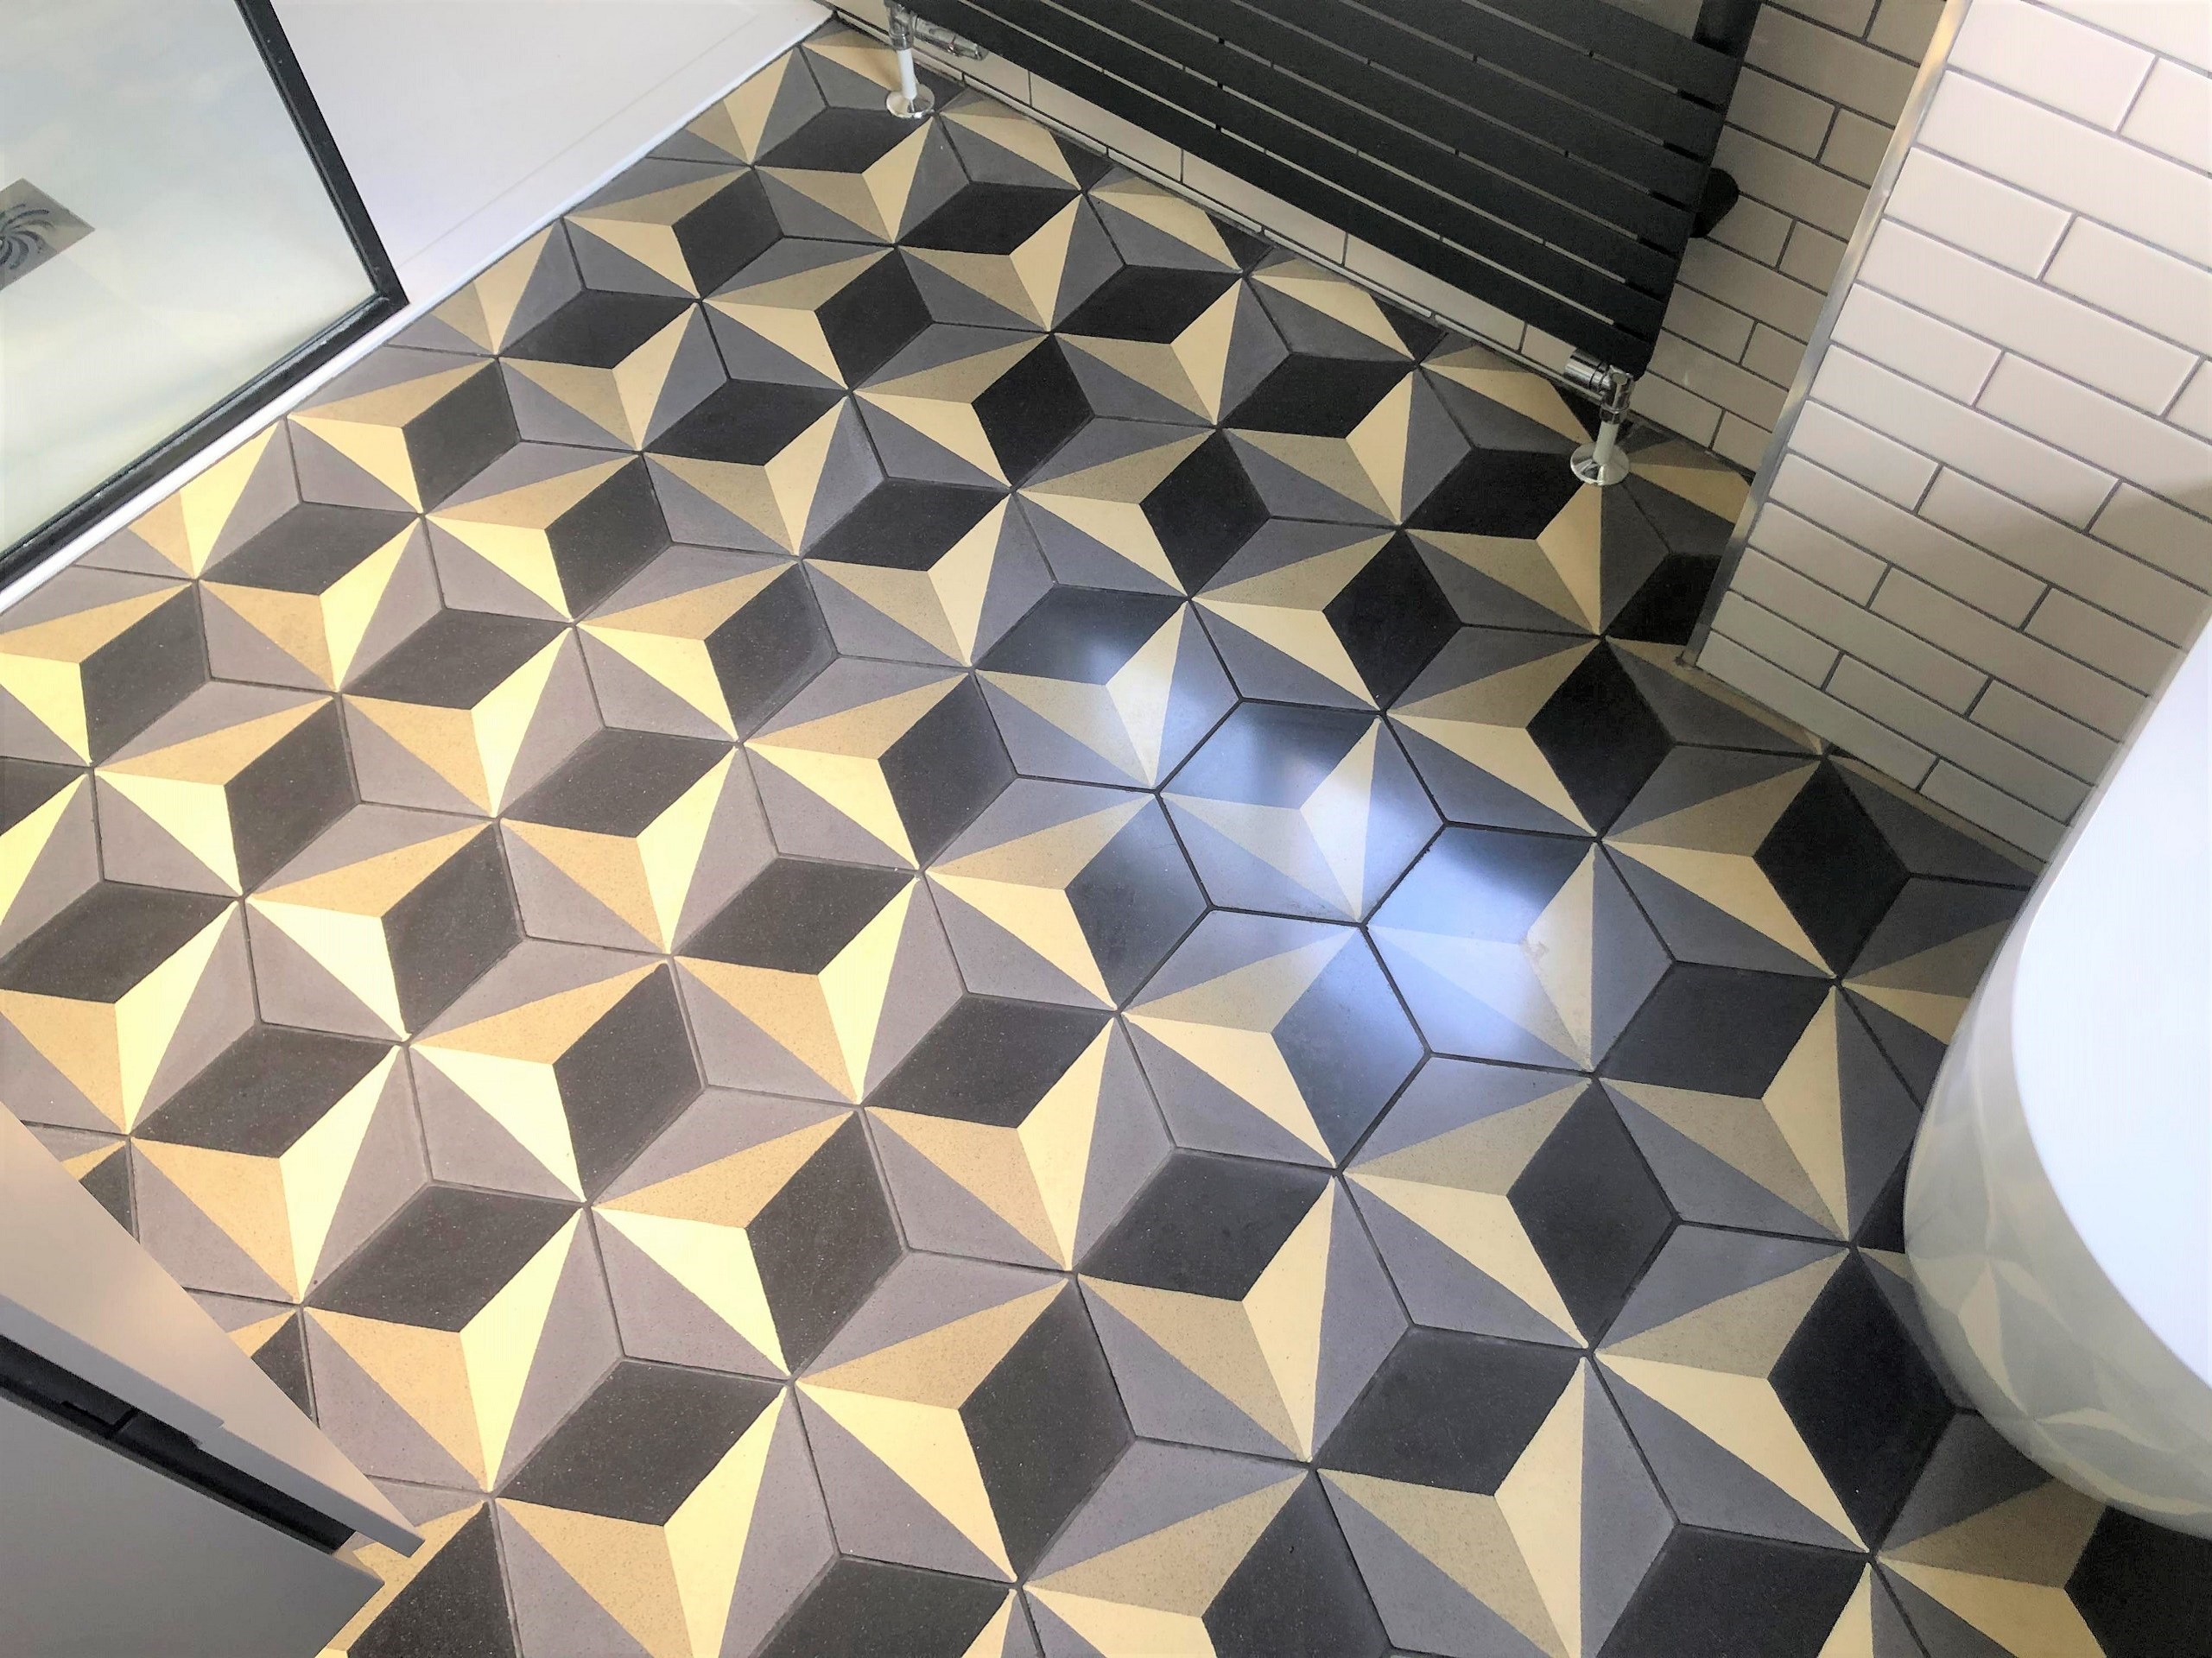
Encaustic Tiled WC Floor Before and After Restoration Histon

Renovation of Encaustic Tiled Bathroom in Histon

These photographs were taken of a bathroom and WC in a property in Histon The client had just had these modern Encaustic tiles laid a couple of months prior. The owner had never been happy with the final look of them and from the markings on the surface it looked like had been damaged in storage or left outside and neglected. They are a pretty unusual design so I can only assume the tiler thought their appearance was perfectly normal at the time of installation.

Encaustic Tiled Bathroom Floor Before Renovation in Histon

I was confident I could improve the appearance of the tiles and gave the client a quote for the work. Whilst she didn’t want to spend more money on her new floor, she did want it to look as it should, so rather reluctantly she agreed to go ahead.

Encaustic Tiled Bathroom Floor Before Renovation in Histon

Histon is next to Impington, they are small villages in Cambridgeshire, over the years the two villages have grown and have entwined together. Many villagers in fact do not know where one village starts and the other ends. The have 6 pubs in total!

Cleaning/Repairing an Encaustic Tiled Bathroom Floor

I wasn’t sure what had been applied to the tiles so after adding protective tape to the wooden skirting I gave them a deep clean with Tile Doctor Remove and Go which was worked into the tiles with a black scrubbing pad. Then to renovate the surface and remove the markings I honed the surface with 400-grit and then 800-grit burnishing pad using water to lubricate the process and rinsing and extracting the soil away after each pad with the wet vacuum.

Sealing an Encaustic Tiled Bathroom Floor

There were two areas that needed work so whilst one area was drying, I was able to get to work on the second and then return to the first later to apply a sealer. My product of choice for this floor was Tile Doctor Colour Grow which is an impregnating sealer which improves the colour and works by penetrating the pores of the tile and protecting it from within. I applied three coats allowing each one to dry before applying the next. The bathroom now looked as it should have done from the beginning.

Encaustic Tiled Bathroom Floor After Renovation in Histon

My client was very happy with the improvement and left the following 5-Star review.

I only had my floor tiles fitted a few months or so ago and was so disappointed with them. I called Tom and within a few hours, he had transformed them! They look absolutely fantastic! Great value for money as well!

I recommended that in order to maintain the tiles, she should use Tile Doctor Neutral Cleaner, this is a pH neutral cleaner which will keep the floor without harming the sealer. Many tile cleaning products are only designed for Ceramic or Porcelain tiles and are too strong for use on sealed floors where they will strip the sealer off with time.

Encaustic Tiled Bathroom Floor After Renovation in Histon


Professional Renovation of an Encaustic Tiled Bathroom Floor in Cambridge

Renovation of Encaustic Tiled Bathroom in Histon Read More »
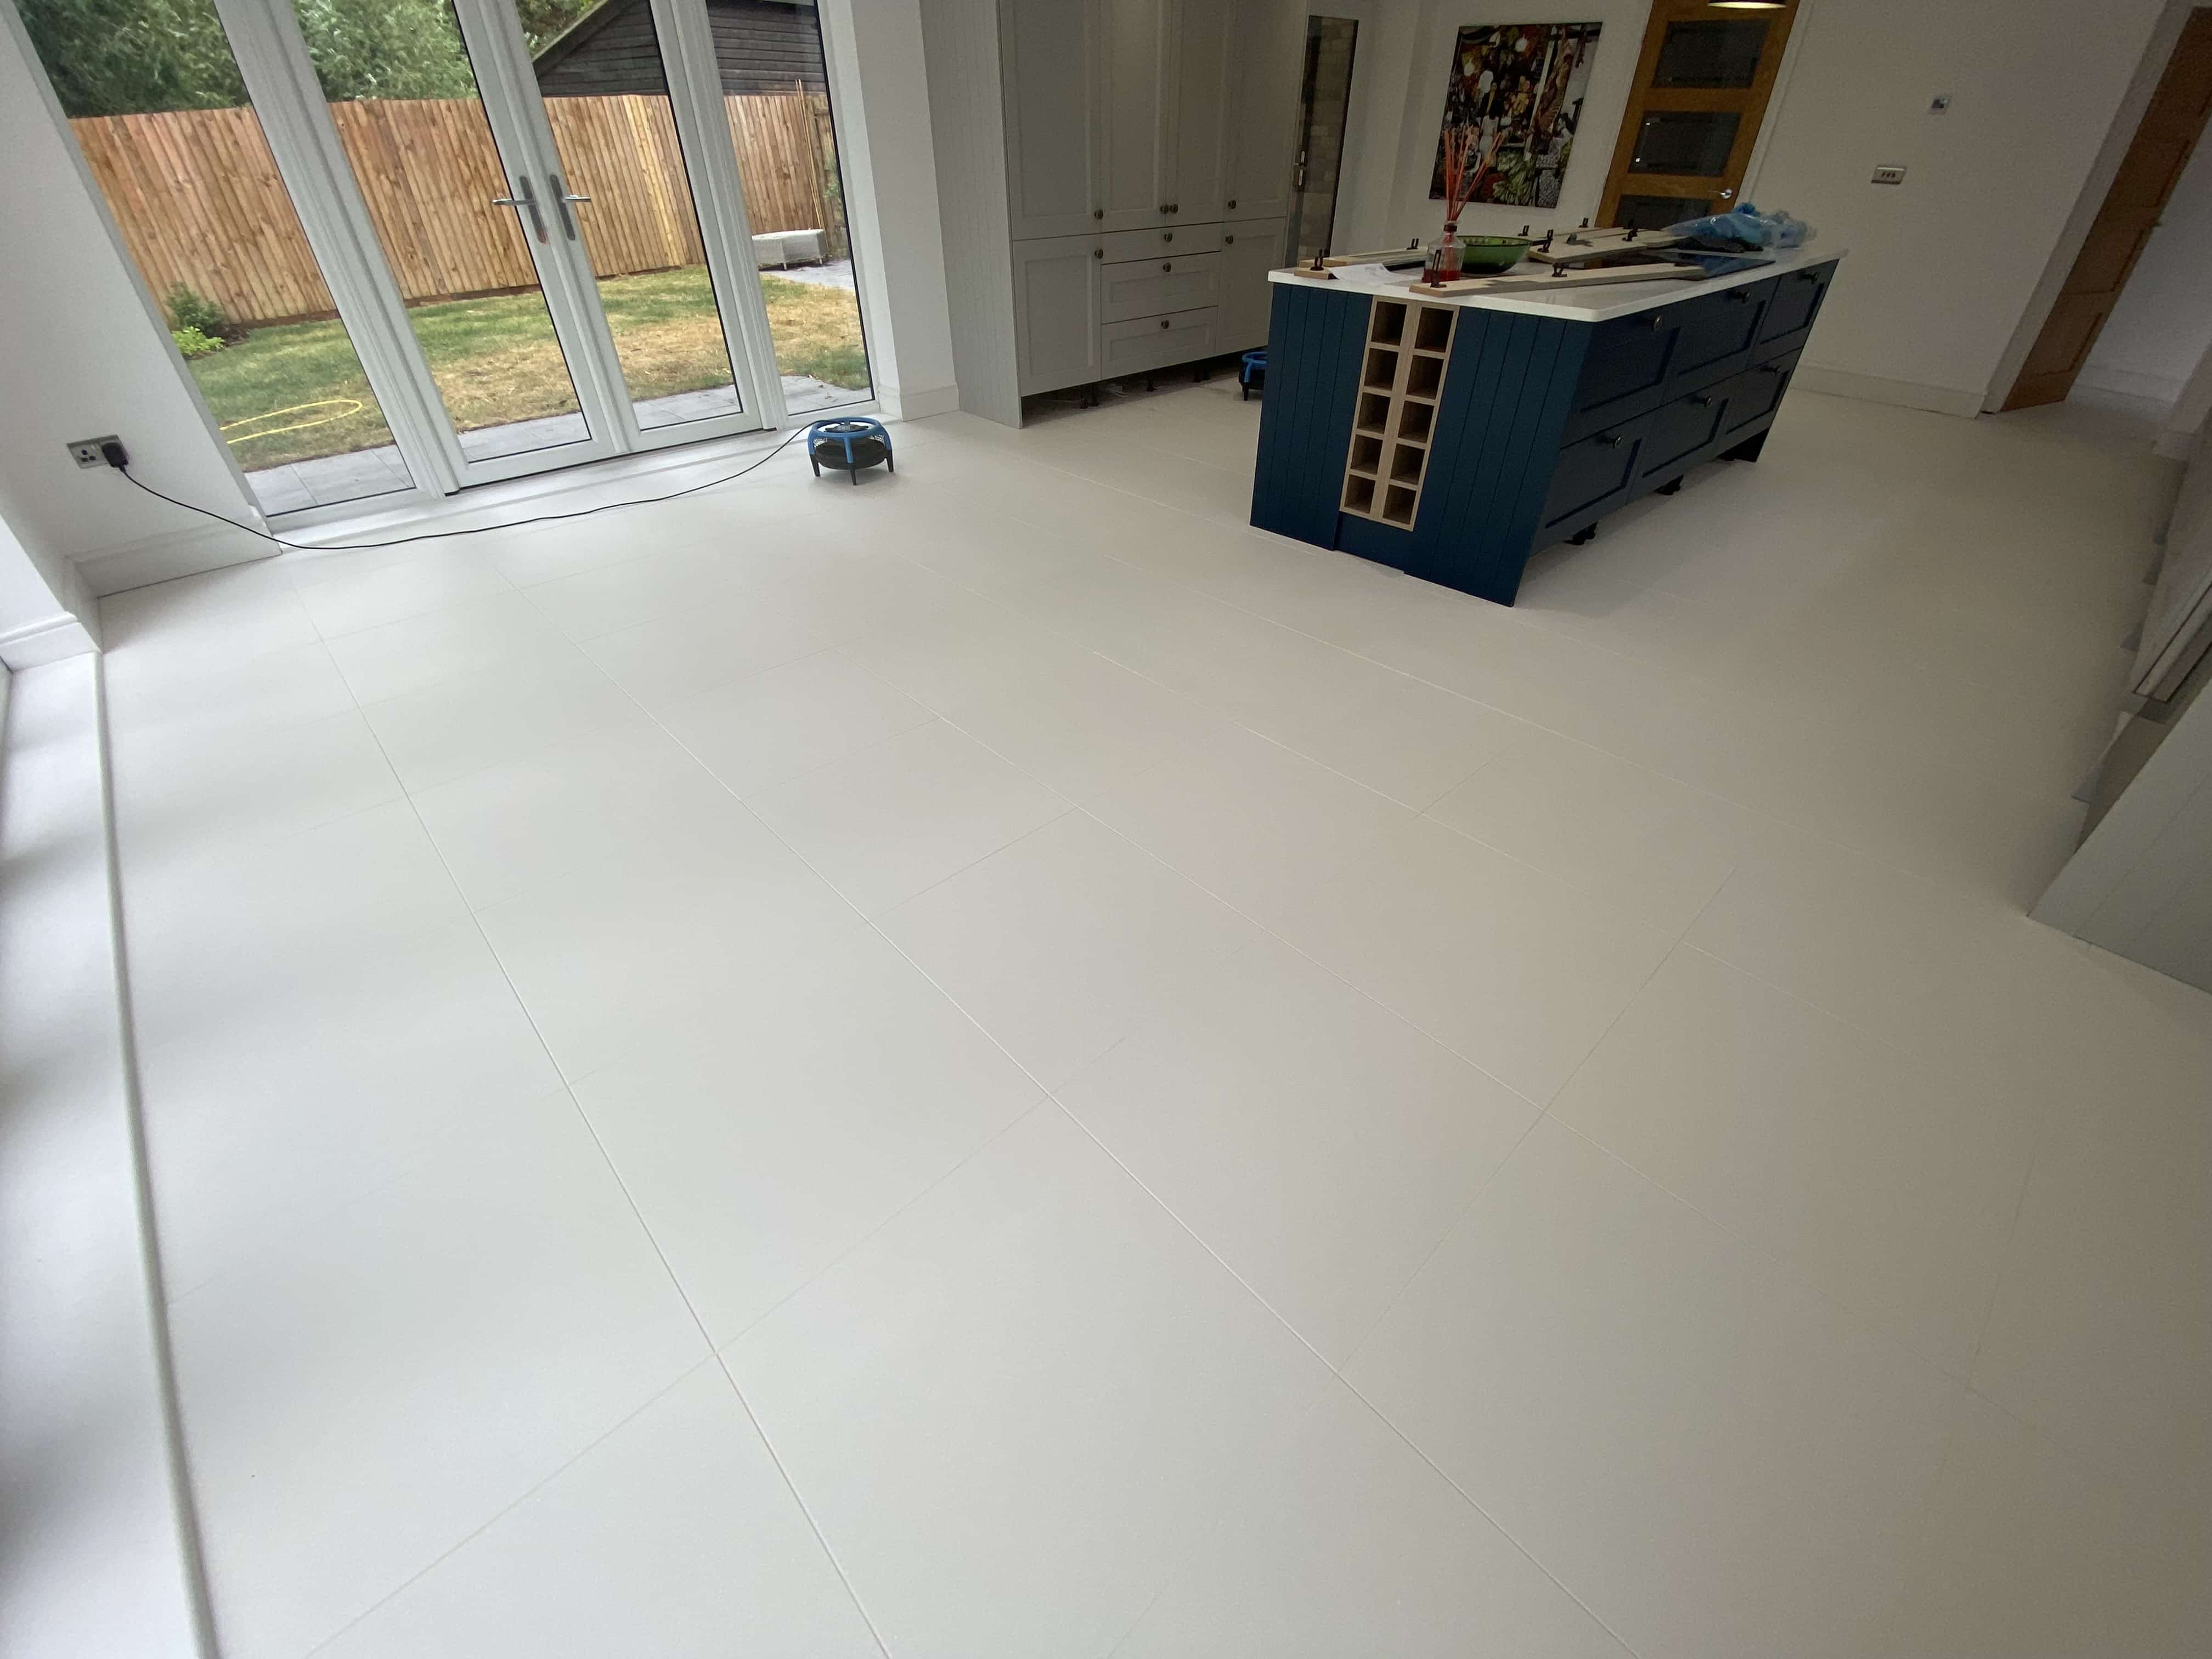
Marble Tiled Floor Before After Polishing Great Shelford

Lack Lustre Marble Floor Given a Deep Durable Shine in Great Shelford

This customer from village of Great Shelford south of Cambridge was unhappy with their Marble tiled floor which lost its lustre relatively quickly after being laid. Fortunately, she was given our contact details from a neighbour who we completed a Marble re-polish for a couple years ago and the floor still looks amazing.

Polished Marble Floor Before Polishing Great Shelford
Polished Marble will loose its appearance over time, especially in a Kitchen due to abrasion it receives from foot traffic and the use of the wrong cleaning product. Because of this problem Tile Doctor now offer a maintenance program where we make an annual visit to the property to re-polish the floor and top up the sealer.

Polished Marble Floor Before Polishing Great Shelford
After discussing the floor, I recommended we hone the Marble tiles with a set of burnishing pads which will bring back the polished appearance and then work in a crystallising powder to achieve a deep shine before applying a sealer to protect the stone going forward. This is the procedure we followed for her neighbour and she was happy to have the same.

Honing Marble Floor Tiles

Firstly, I removed the existing sealer and dirt with a 400-grit diamond burnishing pad which is applied with water to provide lubrication. Although this initially appears to make the floor look worse, this is only temporary and is the first step in restoring the appearance of the stone. Much to the amusement of a couple of Peacocks who appeared by the back door I rinsed the floor with water and removed the slurry from the floor with a wet vacuum.

Polished Marble Floor Visitors During Polishing Great Shelford
Then I worked my way through the 800-grit and 1500-grit burnishing pads again using water to lubricate and rinsing the floor and extracting after each pad. These finer pads start the process or re-polishing the stone and took up most of the day. Once done I gave the floor a final rinse, extracted the slurry and left the floor to dry off overnight.

Polished Marble Floor During Polishing Great Shelford

Sealing Marble Kitchen Tiles

The next day I returned and completed the polishing process by applying the fourth burnishing pad which is an extra fine 3000 grit pad, you apply the pad dry with only a little amount of water sprayed onto the floor in process we call a spay burnish and this final pad really brings up the polish in the Marble.

The next step was to apply Tile Doctor Shine Powder to the Marble. This is a crystallising powder that is worked into the floor using a White Buffing Pad to provide a very high shine and tough durable finish.

Polished Marble Floor During Polishing Great Shelford
Once the polishing was completed, I set about applying the sealer which for this floor I chose Tile Doctor Colour Grow. This is a colour intensifying sealer that provides durable stain protection by impregnating the pores in the stone with sealer so dirt cannot become ingrained there. As you can see from the pictures the sealer dramatically enhanced the natural colours in the stone leaving my client much happier.

Polished Marble Floor After Polishing Great Shelford
Once dry I ran over the floor with the white buffing pad to remove any excess sealer and bring up the sheen of the tiles even further. For aftercare cleaning I recommended the use of Tile Doctor Stone Soap which is designed for the cleaning of polished sealed floor and will help maintain the patina.

Polished Marble Floor After Polishing Great Shelford
 

Professional Restoration of a Marble Tiled Kitchen Floor in West Surrey

Lack Lustre Marble Floor Given a Deep Durable Shine in Great Shelford Read More »

Dirty Terracotta Floor Before After Renovation Haslingfield

Renovating a Dirty Terracotta Kitchen Diner Floor in Haslingfield

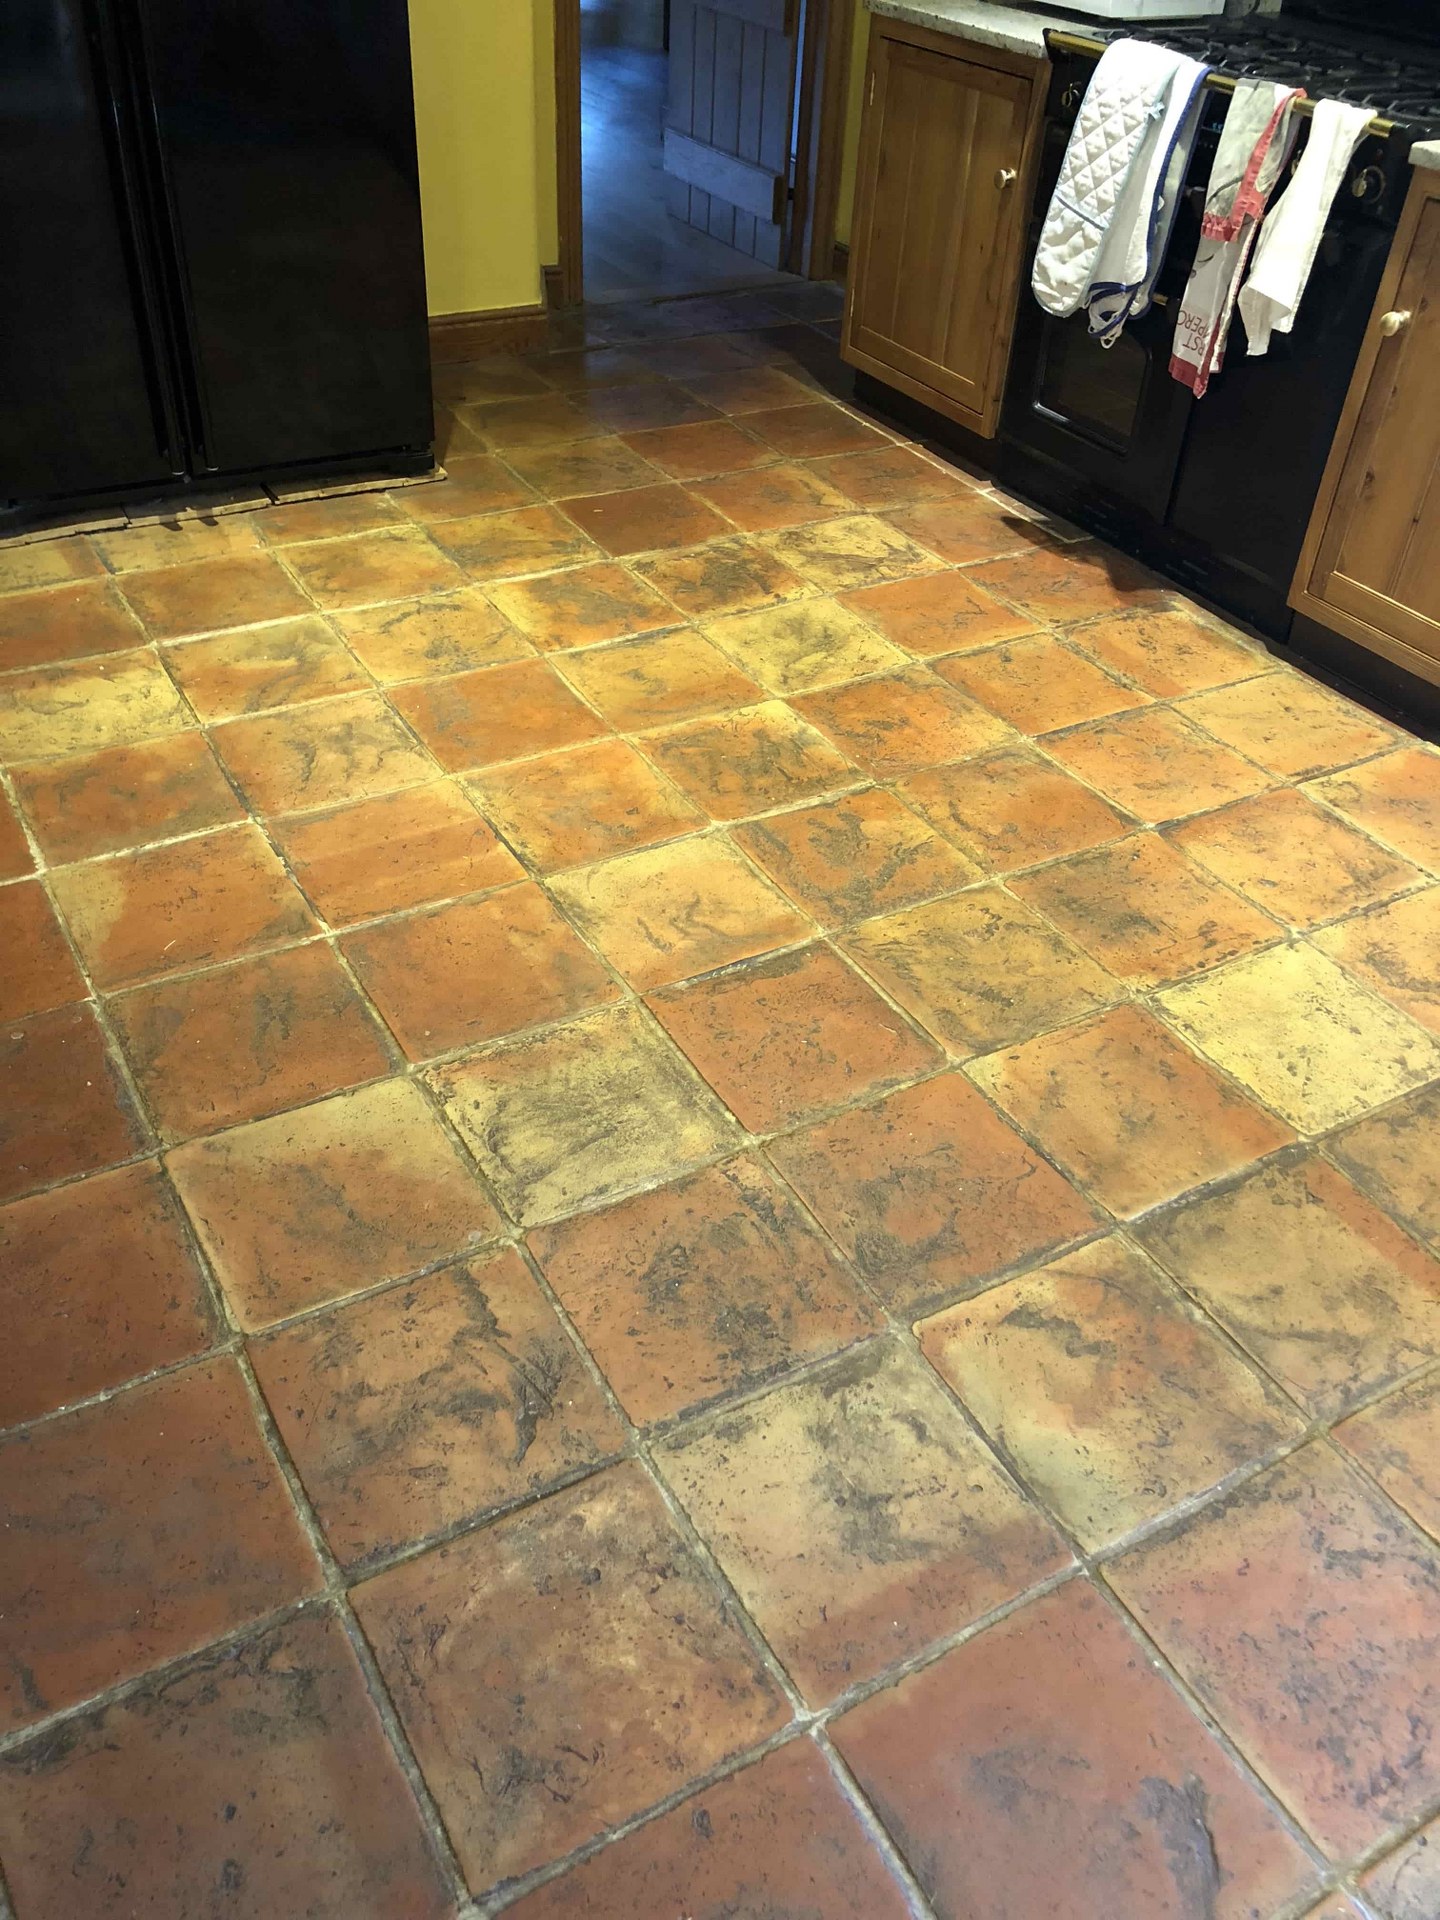
A few months ago, I was asked to look at this Terracotta tiled floor that was installed in the kitchen diner of a house in Haslingfield. The client wanted to have it deep cleaned and re sealed because regular cleaning no longer had any effect and the tiles were now looking very dirty. The village of Haslingfield is only about six miles south-west of Cambridge and only a twenty-minute drive from my base in Dry Drayton.

Terracotta Tiled Floor Before Cleaning Haslingfield Terracotta Tiled Floor Before Cleaning Haslingfield

After discussing the problem floor on the phone, I arranged to visit the property, survey the floor and work out the best course of action. As you can confirm for yourself from the pictures on this page the floor was indeed looking dull and dirty and I suspected the sealer had worn down and was now allowing dirt to build-up in the pores of the tile. I carried out a test clean to show the client what the result could look like and the floor responded rather well. They were very satisfied and happy to go ahead with my quote and so we arranged a convenient time to carry out the work.

Cleaning and Restoring a Terracotta Tiled Hallway Floor

To deep clean and remove what was left of the old sealer I applied Tile Doctor Remove and Go, this is sprayed on and left to soak in for ten minutes. Then it was scrubbed in with a black pad fitted to a rotary machine. The dirt released from the tiles was then rinsed off the floor with water and extracted with a wet vacuum. This process was repeated as needed before turning my attention to the grout lines which was hand scrubbed with Tile Doctor Grout Clean-up which cleans the grout and removes any excess grout.

The floor was given a second rinse and then inspected with any stubborn stains spot treated by with a repeat of the previous process. Thankfully the initial clean had been effective and there were only a couple of areas that needed further attention.

Once the deep clean was completed, the floor was left to dry off overnight and the following morning.

Sealing a Terracotta Tiled Hallway Floor

Returning in the afternoon, I tested the floor for excess moisture with the damp meter. This confirmed the tiles were dry, so I started applying a fresh sealer. I selected to use Tile Doctor Seal and Go for this as this is a specially formulated water-based blend of acrylic polymers which provides both a stain resistant surface seal and a durable low-sheen finish which the client wanted. Five coats were applied allowing enough time for each coat to dry before applying the next.

Terracotta Tiled Floor After Sealing Haslingfield Terracotta Tiled Floor After Sealing Haslingfield

I think you will agree from the pictures there was a remarkable transformation during this restoration. Certainly, my client was very happy with the result and has since had us back to repeat the process on another Terracotta tiled floor. They also left the following comments on the Tile Doctor feedback system which is always appreciated.

Tom did a great job bringing back depth and tone to our very dirty Terracotta kitchen tiles. Very happy with the results.


Professional Renovation of a Terracotta Tiled Floor in Cambridge

Renovating a Dirty Terracotta Kitchen Diner Floor in Haslingfield Read More »

Encaustic Tiled Hallway Floor Before After Restoration Waterbeach

Encaustic Tiled Hallway Cleaned and Sealed in Waterbeach

I was called out to renovate this Encaustic tiled hallway in the Cambridge suburb of Waterbeach. It’s difficult to appreciate from the photographs but the floor was showing signs that the sealant had failed, and no amount of cleaning would get it too look as clean as it used to. Sealers prevent dirt from becoming ingrained into the pores of the tile which leads to a dulling of the overall appearance. My customer was keen to have the floor renovated and asked if I could give it a deep clean and seal.

Encaustic Tiled Hallway Before Cleaning Waterbeach Encaustic Tiled Hallway Before Cleaning Waterbeach

Traditional Encaustic tiles resemble ceramic tiles but are in fact made from multiple layers of compressed cement and usually feature intricate geometric shapes and patterns which are hydraulically pressed into the surface. The process first appeared in medieval times and these tiles can often be found in very old buildings.

Modern production methods have seen a resurgence and you can now find these popular patterns reproduced with ceramic tiles. Ceramic tiles don’t usually need sealing and are therefore very low maintenance. Encaustic tiles however being cement based do need sealing and when used as a floor tile you will need the sealer replacing every three to five years depending on wear. If you like the look of these tiles and live in the local area its worth giving Cambridge CTD Tiles a visit as their local showroom stock several similar styles in Ceramic.

Removing Old Sealers from Encaustic Cement Tiles

After protecting the skirting boards with tape, I set about getting the floor clean and free of what was left of the old sealer. Removing old sealers first is important as to apply new sealer on top of the old will result in different thicknesses and the floor looking patchy. To do this I applied a strong dilution of Tile Doctor Remove and Go which is a coatings remover and cleaner. It’s sprayed onto the floor, left for ten minutes and then scrubbed in with a rotary machine fitted with a black scrubbing pad. The floor was then rinsed with water and the soil extracted.

To bring up the appearance of the encaustic tiles I polished the floor with an 800-grit and then 1500-grit diamond burnishing pads using a little water to help lubricate the process. I rinsed the floor with a little more water and extracted the fine slurry generated after each pad was applied. The floor looked much better already.

Sealing Encaustic Floor Tiles

I gave the stone a few hours to dry off and due to the warm conditions, I was able to apply two coats of Tile Doctor Colour Grow impregnating sealer on the same day. Each coat was left to dry off before applying the next. Tile Doctor Colour Grow is a colour intensifying impregnating sealer that provides durable protection by occupying the pores in the tile so dirt can’t become ingrained there.

Before leaving I finished off the floor by removing any excess sealer residue with a 3000-grit polishing pad.

Encaustic Tiled Hallway After Cleaning Waterbeach Encaustic Tiled Hallway After Cleaning Waterbeach

The client was very happy with the floor restoration once completed. I discussed with them the best aftercare and recommended they should use Tile Doctor Neutral Tile Cleaner which is pH neutral so will maintain the integrity of the newly applied seal and will ensure the floor is protected for some time to come. It is suitable for regular use, has a nice fresh fragrance and a small amount goes a long way.

Encaustic Tiled Hallway After Cleaning Waterbeach


Professional Renovation of an Encaustic Tiled Hallway Floor in Cambridgeshire

Encaustic Tiled Hallway Cleaned and Sealed in Waterbeach Read More »

Block Paved Patio Before After Renovation Duxford

Cleaning and Re sanding a Block Paved Patio in Duxford

I was called out to a house in Duxford to quote for cleaning kitchen floor tiles when the customer realised, we could also clean and re-sand block paved patios. We provided her with a quote and booked the work in alongside her kitchen tiles which I will detail in another post.

Duxford is a small village around 10 miles from Cambridge, and is an area which is rich in history. Duxford is most famous for RAF Duxford, a former RAF airfield that was used as a sector station during the Battle of Britain. Back in 1972 the Ministry of Defence began to store historically important aircraft in the hangars on the airfield and it is now used to house the Duxford Imperial War Museum .

Dirty Block Paved Patio Before Deep Cleaning Duxford

The block paved patio was looking worse for wear after the winter, what was once lovely shades of red brick was now dark and almost black in places with dirt and algae. Regular maintenance is always suggested to ensure the paving is looked after and to prevent it becoming slippery.

Dirty Block Paved Patio Before Deep Cleaning Duxford

Cleaning an outside Block Paved Patio

Our first job was to sweep the patio down to remove loose dirt and leaves.

Next job was to tackle the heavily stained areas that were treated with Tile Doctor Pro-Clean solution which was applied neat and left to soak in for fifteen minutes. Normally I would dilute Pro-Clean with water but in this case, I needed the full power of the product and even applying such a strong solution would not cause the brick pavers any harm. Whilst the Tile Doctor Pro-Clean was soaking in, I set up the high-pressure machine in my van and ran the long hose out to the garden area.

The Tile Doctor Pro-Clean was then scrubbed in by hand with a long handled scrubbing brush. The area was quite large, so this took most of the morning. The patio really was very dirty so lifting the layers of dirt took some time.

Next the block paving was deep cleaned using water delivered under high pressure from a wand supplied by our truck mounted cleaning machine. This machine can deliver water at various pressure levels, much higher than your average Karcher and makes easy work of cleaning patios. Immediately the patio started to look dramatically cleaner.

Once the block patio was done, I left it to dry and turned my attention to the decking around the other side of the house.

Re Sanding a Block Paved Patio

After a day of drying out we returned the following morning to re-sand the patio with kiln-dried sand which is essential to maintain the integrity of the patio and keeping the weeds down.

Dirty Block Paved Patio After Deep Cleaning Duxford

The renovation process worked really well, and the patio now looks as new as it did when it was laid. My customer was overjoyed with the results, hopefully the weather will enable them to get the patio furniture out so they can have lots of barbeques this year and make the most of the space.

Dirty Block Paved Patio After Deep Cleaning Duxford


Professional Block Paved Patio Renovation in Cambridgeshire

Cleaning and Re sanding a Block Paved Patio in Duxford Read More »

Victorian-Tiled-Hallway Floor Renovated in Girton

Victorian Tiled Hallway Floor Repaired and Restored in Girton

The owner of this Victorian tiled hallway floor at a house in the village of Girton was unhappy with its condition and asked if we could call round and quote for having it deep cleaned and resealed. Girton is just north of Cambridge and only about six miles from our base so it wasn’t long before I was able to call in and survey the floor.

Victorian Tiled Hallway Before Cleaning Girton

The floor was comprised of a combination of Red, Black and Cream tiles laid in a diamond pattern. The tiles were in good physical condition and I understand from the owner that it had been last cleaned and sealed about two years prior. Unfortunately, the sealer had now faded and had allowed dirt to become trapped in the pores of the tile giving it a grubby appearance that was difficult to clean effectively. The owner had two large dogs which I suspect contributed to the premature degradation of the sealer.

Victorian Tiled Hallway Before Cleaning Girton Victorian Tiled Hallway Before Cleaning Girton

I surveyed the floor, created a quote which was accepted and then agreed a date to return and renovate the floor.

Repairing a Victorian Tiled Hallway Floor

On my return I started by taping up the skirting boards and other woodwork with protective tape. Once that was done, I gave the tiles a soak in a medium dilution of Tile Doctor Remove and Go which was allowed to dwell for ten minutes before being scrubbed in using a black scrubbing pad fitted to a rotary floor buffer. Remove and Go is a coatings remover which cleans the tiles and removes any remaining sealer.

The soil generated was extracted off the floor using a wet vacuum and the tiles inspected. The tiles had responded well to the cleaning process and after spot treating a few areas with a repeat of the previous process it was ready for the next stage which was to give the floor an acid wash.

I had noticed there was a slight build-up of efflorescence along one of the walls which isn’t unusual on these old floors where no damp proof membrane has been installed under the floor. It’s caused by moisture rising through the tile and depositing white salt staining on the surface as it evaporates. To resolve this, we neutralise the salts by giving the floor a quick rinse in a dilution of Grout Clean-up.

The Grout Clean-Up rinsed off the floor with water and extracted with the wet vacuum which was employed to get the floor as dry as possible before leaving for the evening.

Sealing Victorian Hallway Tiles

The floor was left to dry off fully overnight and I returned the next day, unfortunately after checking the moisture levels I found it needed more drying time, so I agreed to come back the next day.

The moisture levels were fine on day three, so I applied multiple coats of Tile Doctor Seal and Go. Seal and Go is a water-based product so you don’t get left with a smell as it dries. As well as protecting the tiles the sealer also adds a nice subtle sheen that works well on Victorian Tiles and has put new life into the tiled hallway.

Victorian Tiled Hallway After Cleaning Girton Victorian Tiled Hallway After Cleaning Girton

Seal and Go is a breathable sealer so it will allow moisture to rise up through the tiles however had the efflorescence problem had been worse I would have used a different sealer. On this occasion however the problem appeared to be historical rather than recent.

My client was very happy with the transformation and left the following feedback.

“We are delighted with our Victorian tiled hall floor after treatment by Tom from Tile Doctor. A very professional service. Good communication throughout, and dedication to ensuring our full satisfaction; not a ways obvious when dealing with old tiles with different levels of porosity! Thank You!”

Victorian Tiled Hallway After Cleaning Girton


Repair Restoration of a Victorian Tiled Hallway in Cambridgeshire

Victorian Tiled Hallway Floor Repaired and Restored in Girton Read More »
Large Limestone Tiled Floor Before After Polishing Boxworth

Large Limestone Floor Polished to a Deep Lustre in Boxworth

I was asked to visit a house in Boxworth Cambridge to survey a large Limestone tiled kitchen, dining room, utility and hallway. The customer was not happy with the finish of the tiles and wanted it to have more lustre. Additionally, the floor had suffered some damage in the dining room where the floor had been scratched by table and chair legs.

Limestone Tiled Floor Before Cleaning Boxworth Cambridge Limestone Tiled Floor Before Cleaning Boxworth Cambridge

Boxworth is a small village of around 100 houses, this property being one of the larger ones. The village lies around eight miles to the north west of Cambridge. I examined the floor and discussed with the client the process we would use. Although not looking their best, I could see that the Limestone tiles contained a variety of natural colour shades which with the right treatment could be made to really come to life. I presented a quote which they were happy to accept.

Limestone Tiled Floor Before Cleaning Boxworth Cambridge Limestone Tiled Floor Before Cleaning Boxworth Cambridge

Cleaning a Limestone Tiled Kitchen and Hallway Floor

My first job was the protect all the surrounding areas from splashing during the cleaning process. To do this I removed the kickboards from underneath some of the kitchen units, elsewhere was covered with a blue protective film.

To start the cleaning, I first applied a dilution of Tile Doctor Remove and Go to the floor and then worked it in using a black scrubbing pad fitted to a rotary machine. I also scrubbed the grout by hand as the pads can struggle to reach into the recessed grout line. After rinsing the floor with water, the soiled solution was then extracted off the floor using a wet vacuum.

Limestone Tiled Floor During Polishing Boxworth Cambridge Limestone Tiled Floor During Polishing Boxworth Cambridge

I followed up this process with the application of a set of Diamond burnishing pads starting with the coarse 400-grit pad, then medium 800-grit pad, fine 1500-grit pad and finishing with the extra fine 3000-grit pad. The pads are fitted to a rotary floor buffer and are run over each tile using water for lubrication. All the slurry produced by the cleaning pads is removed away using our truck mounted hot water extraction machine to cause minimum mess to the client.

The floor was left to dry off overnight and I would return the next day to finish the polishing process.

Sealing a Limestone Tiled Kitchen and Hallway Floor

On the following day, we checked the floor was completely dry and then using a white buffing pad ground Tile Doctor Shine Powder into the Limestone floor. The powder builds up a deep and durable polish on the tiles leaving a deep and resilient lustre.

Limestone Tiled Floor After Polishing Boxworth Cambridge Limestone Tiled Floor After Polishing Boxworth Cambridge

To further protect the stone and enhance the natural colours in the Limestone a couple of coats of Tile Doctor Colour Grow impregnating sealer were applied followed by a light buff with a red pad. The sealant is an impregnator that seeps into the pores of the stone protecting it from within and intensifying the natural colours in the stone.

When finished the floor looked great. We had managed to remove the scratches from the dining area and the floor now had the lustre that the client had been hoping for.

The client was extremely happy with the outcome and gave the following feedback:

“Quoted very quickly, carried out the work quickly and efficiently with no fuss.”

Limestone Tiled Floor After Polishing Boxworth Cambridge Limestone Tiled Floor After Polishing Boxworth Cambridge


Professional Restoration of a Limestone Flooring in Cambridgeshire

Large Limestone Floor Polished to a Deep Lustre in Boxworth Read More »

Pitted Limestone Floor Before After Renovation Warboys Cambridgeshire

Pitted Limestone Tiled Floor Deep Cleaned and Sealed in Warboys

The photographs below are from a Limestone tiled floor which had been installed throughout the kitchen, hall and downstairs WC of a property in the Cambridgeshire village of Warboys. The owner was fed up with the floor which was not cleaning up after multiple attempts, he surmised it was overdue a deep clean and re-seal and so got in touch with us to do the work.

Limestone Tiled Floor Before Cleaning Limestone Tiled Floor Before Cleaning

We visited the property to survey the floor and could straight away that the owner was right to call us, the floor was definitely overdue a professional clean and he would not have been able to improve it without the right equipment. It was a large space and being the hallway and kitchen area, it was subject to a lot of foot traffic so was not looking its’ best. One of the biggest problems was the pitting in the Limestone which had trapped a lot of dirt which was difficult to shift. We discussed the options and the cost for the work which was agreeable to the client and arranged an appointment to return to carry out the renovation.

Deep Cleaning and restoring a Limestone Tiled Kitchen and Hallway Floor

Before starting I wrapped protective tape around the woodwork and removed the kickboards from underneath the kitchen units to protect them during the cleaning process.

Limestone and Travertine are notorious for pitting and on this floor the pits had trapped dirt making it look very unattractive. To deal with this I applied a strong dilution of Tile Doctor Remove and Go, allowed it to soak in and break-down the dirt and old coatings such as sealers for ten minutes and then scrubbed it in with a 400-grit diamond burnishing pad fitted to a rotary machine.

To remove the slurry that was generated I used our hot water pressurised extraction system which is a great tool that operates from a large compressor situated in my van which was parked outside. It fires hot pressurised water onto the floor via a floor spinner tool and then extracts the dirty water back onto a tank in the van. The pressure allows the water to penetrate deep into the pits of the stone to maximise the dirt extracted. This machine was an expensive investment however it saves a lot of time and allows me to achieve some outstanding results.

This process was repeated across the floor using the 800-grit and then the 1500-grit diamond burnishing pads using only water to lubricate and the extraction system to extract the slurry afterwards.

There were number of areas to cover so it took most of the day to clean all the floors, by the end of the day however the floor looked much cleaner and brighter. I left the floor to dry out overnight and came back the next day to apply a sealer.

Sealing a Limestone Tiled Kitchen and Hallway Floor

The next day I inspected the floor and checked it was dry before applying the sealer. To seal the Limestone I applied multiple coats of Tile Doctor Colour Grow which is an impregnating sealer which penetrates into the stone, protecting it from within and enhancing the natural colours in the stone in the process. Any excess sealant was buffed off the surface with a cloth after ten to fifteen minutes.

Limestone Tiled Floor After Cleaning Sealing Limestone Tiled Floor After Cleaning Sealing

The sealer really brought out beauty and colours in the natural stone and the floor was transformed in just two days. The owner of the house was happy with the results and left the following feedback on the tile doctor feedback system.

‘Tom did a superb job of cleaning my tiles to look like new. Very professional, methodical and proud of his work’
Brian A, Warboys


Professional Renovation of Pitted Limestone Floor Tiles in Cambridgeshire

Pitted Limestone Tiled Floor Deep Cleaned and Sealed in Warboys Read More »

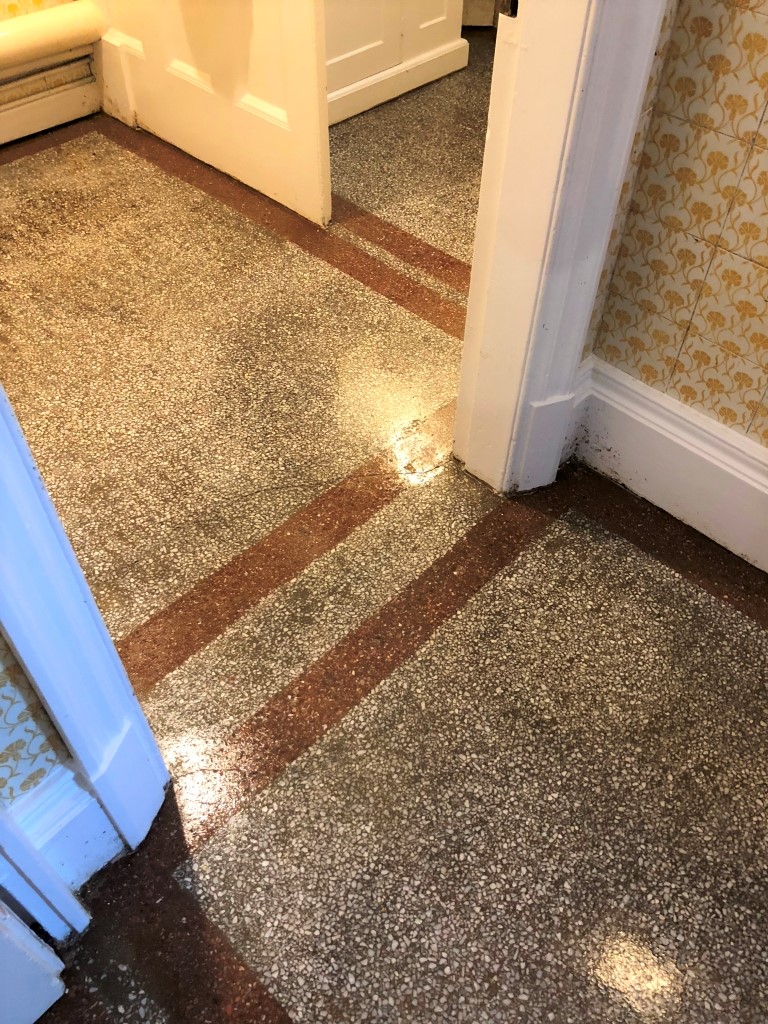
Victorian Terrazzo Floor Tiles Before After Renovation Newmarket

Restoring a Victorian Terrazzo Tiled Hallway, Newmarket

The owner of an older property in Newmarket got in contact with us about restoring his Victorian Terrazzo Tiled Hallway. We like to do a site survey to ascertain the condition of the floor and give the client a fixed price for the works, so we organised a time to pop over and look at the floor.

Adhesive Covered Victorian Terrazzo Hallway Before Cleaning Newmarket Adhesive Covered Victorian Terrazzo Hallway Before Cleaning Newmarket

The floor had taken a battering over the years and was completely unrecognisable after being completely covered up with carpet that had been secured in place with a lot of adhesive. Removing the glue and restoring an old floor like this is a difficult task but something we are familiar with and we were confident it could be restored to a reasonable standard. We discussed with the client the process and agreed a price to carry out the restoration.

Cleaning and restoring a Victorian Terrazzo Tiled Hallway Floor

The first day consisted of adding protection to the wooden skirting and then carefully scraping off as much excess adhesive as possible. To remove the rest of the glue a thick coat of Tile Doctor Nano Tech HBU remover was applied. I had tried applying this product on the floor first, but it struggled to make any impact given the huge amount of adhesive that was present. Incidentally HBU stands for Heavy Build-Up which pretty much described the problem with the floor. I left the HBU to dwell for about fifteen minutes, scrubbed it in and then rinsed off the soil with water and extracted with a wet vacuum.

To finish the job, I then repeated the process with a coat of Tile Doctor Remove and Go which was scrubbed it in to the floor to release the last bits of adhesive. Again, the floor was rinsed with water and the soil extracted with a wet vacuum. The floor was then inspected to ensure all the adhesive had been removed and stubborn areas were spot treated using a mixture of techniques until I was happy.

Removing the adhesive was hard work and took up the whole of the first day but was well worth the effort as the Terrazzo was now visible and the end goal was in sight. So, returning the next day we proceeded to build on the restoration by honing and polishing the Terrazzo with 100 through to 3000-grit diamond encrusted burnishing pads. They are applied in sequence i.e. 100, 200, 400, 800, 1500 and finally 3000 grit, using water to lubricate and then more rinsing and extracting between each pad.

With the glue was removed and the Terrazzo renovated a large crack was clearly visible across part of the hallway floor, whilst it’s not possible to repair this without taking up the floor I was able to improve its’ appearance by applying a matching filler to the cracks whilst the floor dried.

Sealing a Victorian Terrazzo Tiled Hallway Floor

The final stage was the application of an impregnating sealer. We selected to use Tile Doctor Colour Grow which is a colour enhancing product that soaks into the pores of the stone protecting it from within. It had been some time since the Terrazzo had been sealed so it took more coats then usual to properly seal the floor.

Adhesive Covered Victorian Terrazzo Hallway After Cleaning Newmarket Adhesive Covered Victorian Terrazzo Hallway After Cleaning Newmarket

As you can see the floor looked a lot better once completed, the client was very happy with the final result and left the following feedback:-

”We knew that restoring our Victorian Terrazzo floor was going to be a very difficult job, so we were heartened when Tom was so positive about doing a good job and his quotation was very reasonable. He tackled the work very professionally, always turned up on time, explained exactly what he was doing and minimised our inconvenience. We are delighted with the finished job (at the quoted price!) and would have no hesitation in recommending Tom to anyone who needs a similar service.” Des B, Newmarket

Adhesive Covered Victorian Terrazzo Hallway After Cleaning Newmarket


Professional Restoration of a Victorian Terrazzo Tiled Hallway in Cambridgeshire

Restoring a Victorian Terrazzo Tiled Hallway, Newmarket Read More »

Limestone Tiled Kitchen Floor Before and After Polishing in Boxworth

Polishing Dull Limestone Floor Tiles to a High Shine in Boxworth

Boxworth is a very small village situated to the north-west of Cambridge. In the Middle Ages, it had a significant population, but in the modern day there are only around 100 houses in the area including one belonging to my customer.

I was there to take a look at a large installation of Polished Limestone floor tiles which had been laid throughout the ground floor including the Kitchen, Dining, Utility room and hallway.

Limestone Tiled Kitchen Before Polishing Boxworth Limestone Tiled Dining Room Before Polishing Boxworth

Many people will already know that Limestone is a premium, yet somewhat sensitive natural stone. It’s also porous, meaning that dirt can easily become ingrained if the tiles are not sealed properly, or if the sealant has worn away. This leads eventually to a very unappealing, dirty, and dull appearance which often happens so slowly it hardly get’s noticed until one day you think, “I’m sure my floor looked better than that before!”.

Limestone Tiled Hallway Before Polishing Boxworth Limestone Tiled Utility Before Polishing Boxworth

In this case the sealer had degraded over time and my customer had called me in because she was now no longer happy with the appearance of the tiles. The lustre the tiles once had eventually disappeared and there was also damage in some areas caused by the placement of table and chair legs. I was asked to restore a high-quality polished finish to the tiles.

Cleaning and Burnishing Limestone Tiles

Before beginning the restoration, I took the necessary precaution of covering the walls and kitchen units to protect them from exposure to any cleaning products or mess.

To begin, I applied Tile Doctor Remove and Go, which is a high-performance stripping agent, to break down any old sealant remaining of the tiles. This product can also be used to clean the stone itself, as well as the grout lines.

After completing the initial cleaning process, I moved on to restoring the polish to the tiles. At Tile Doctor, we do this using a system we have developed called Burnishing. This system involves the application of Diamond encrusted pads – each possessing a different level of grit – to grind away the dirt from the stone, which is often stained or damaged. The process effectively resurfaces the stone leaving it looking new and fresh.

Firstly, I applied the Coarse 400 grit pad, fitted to a rotary machine, to grind away any excess muck and sealant lubricated with a little water. The resultant slurry was rinsed away and I followed up with the application of the Medium 800 grit pad to start the restoration of the polish again with a small amount of water, followed by the Fine 1500 grit pad for the second polish.

Finally, I applied the Very Fine 3000 grit pad to achieve the most refined and highest quality polish possible. The process of burnishing is a gradual but highly effective means of achieving this kind of finish.

Any slurry that was created through this process was removed using my truck-mounted hot water cleaning and extraction machine, resulting in minimum mess.

Sealing Limestone Tiles

After burnishing the tiles and to achieve a really hard wearing and high polish I covered the floor in Tile Doctor Shine Powder crystals and buffed them into the Limestone tiles using a White buffing pad. Then to give the floor extra protection I applied a coat of Tile Doctor Colour Grow, which impregnates the pores of the stone to prevent ingrained dirt.

Colour Grow also intensifies the natural colours in the Limestone, thus improving the appearance of the stone to an even greater extent. Following the application of Colour Grow, I gave the tiles a final light buffing with a soft red pad.

Limestone Tiled Kitchen After Polishing Boxworth Limestone Tiled Utility After Polishing Boxworth

The customer was extremely happy with the outcome, remarking that the work was carried “quickly and efficiently with no fuss.” I took lots of photographs of the process, so you can really appreciate the difference that was made.

Limestone Tiled Hallway After Polishing Boxworth Limestone Tiled Dining Room After Polishing Boxworth


Professional Polishing of a Dull Limestone Tiled Floor in Cambridgeshire

Polishing Dull Limestone Floor Tiles to a High Shine in Boxworth Read More »

Quarry Tiled Kitchen Before and After Restoration in Cambridge

Full restoration of a Lino Covered Quarry Tiled Kitchen floor in Cambridge

This job was for a lovely old lady in Cambridge, her kitchen floor had been covered with a wood effect Lino thirty years earlier and she felt it was time to have it removed and have the original Kitchen Quarry tiles underneath restored.

Kitchen Quarry Tiled Floor Covered with Lino Cambridge Kitchen Quarry Tiled Floor Covered with Lino Cambridge

The lino was good quality having stood the test of time however to ensure the lino didn’t sink into the grout lines the whole floor had been levelled with some sort of screed which would need to be carefully removed.

Kitchen Quarry Tiled Floor with Lino Removed Cambridge Kitchen Quarry Tiled Floor with Lino Removed Cambridge

Removing the Linoleum covering and cleaning the floor

My first task was to carefully scrape off as much of the linoleum covering as possible without damaging the floor beneath. I managed toe remove most of the screed by lightly chipping away with a chisel and hammer followed by a blade to scrape as much screed as possible off the tile and grout.

To deal with the remaining screed I used a strong dilution of Tile Doctor Grout Clean-up which is an acidic product and needs to be applied with care. It was scrubbed in using a rotary machine running on slow speed and fitted with a black scrubbing pad. To remove the soil I used our truck mounted hot water extraction machine which applies hot water under pressure with a special lance that simultaneously extracts the waste back to a tank on the van.

The last stage of cleaning was to apply a coat of Tile Doctor Oxy-Gel to remove any previous sealer that may still be present on the tile. As well as using the scrubbing machine I also used a stiff brush along the grout lines as well. Final step was another rinse with the truck mounted extraction machine before leaving the floor to dry off fully overnight.

Kitchen Quarry Tiled Floor Before Restoration Cambridge Kitchen Quarry Tiled Floor Before Restoration Cambridge

Sealing Kitchen Quarry Tiles

When I returned to the property I used a damp meter to test the floor, making sure that the surface was dry enough to commence sealing (as any excess solution can affect the performance of the sealer). My sealer of choice was Tile Doctor Seal & Go Extra, a topical sealer which works well on Quarry tiles restoring appearance and providing a nice finish along with durable protection. This particular sealer is also suitable for floors where damp maybe an issue and with an old floor like this installed before the invention of Damp Proof Membranes choosing the right sealer is very important to avoid issues with efflorescence.

Kitchen Quarry Tiled Floor After Restoration Cambridge Kitchen Quarry Tiled Floor After Restoration Cambridge

The floor was completely transformed and the client was extremely happy with the out come and even left the following lengthy testimonial on the Tile Doctor Feedback system which is always appreciated.

“Tom did excellent work on quite a tricky job. Our kitchen tiles are over sixty years old. Tom took up and disposed of our old kitchen Lino, removed the layers of concrete screed, then buffed, glossed and sealed the original tiles until they shone like new! The natural salts worked their way to the surface of the tiles just like Tom said would happen, and a fortnight later Tom returned to re-surface and re-gloss the tiles. The floor now looks great. Tom was very professional throughout and the work was no easy job to accomplish, so he has done a great job. We are very pleased with our kitchen floor, which now has a new lease of life. I would recommend the Tile Doctor if you need a floor restored at any time.
Miss Webber, Cambridge 02 August 2017”

Restoring a Quarry Tiled Floor Hidden under Vinyl in Cambridge

Full restoration of a Lino Covered Quarry Tiled Kitchen floor in Cambridge Read More »

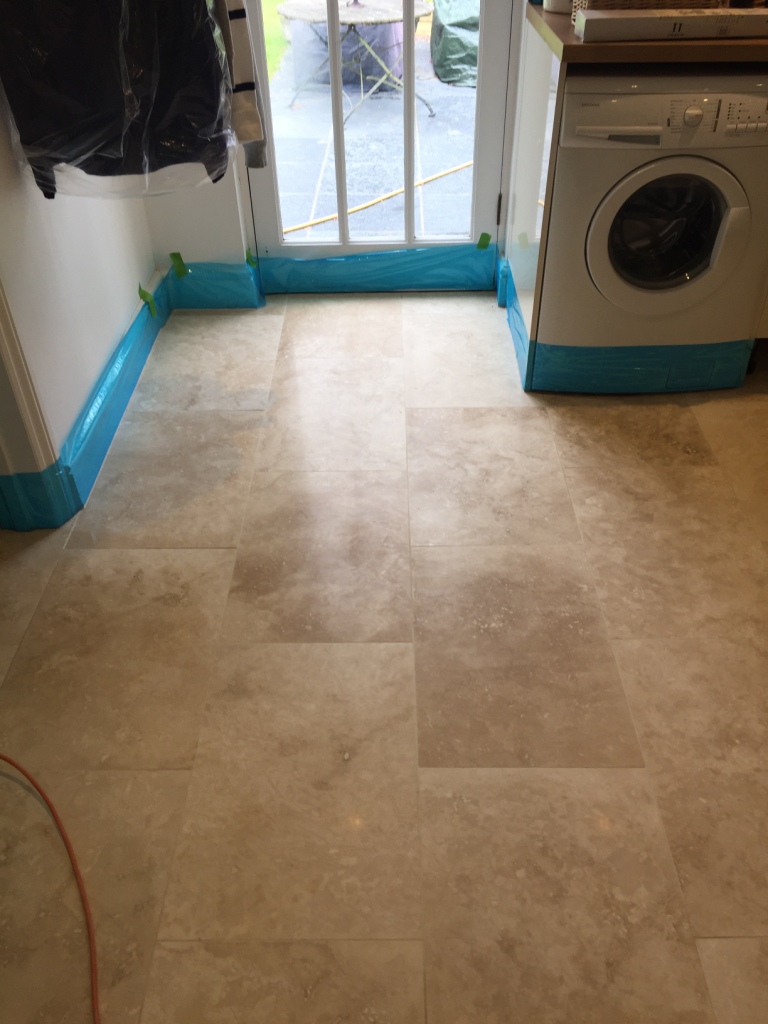
Lustre Restored to Large Area of Travertine Tiles in Cambridge

Lustre Restored to Large Area of Travertine Tiles in Cambridge

Travertine is a type of Limestone which exists in several variations, including white, tan, and cream-colored. It has distinct colourings and patterns that no other stone can offer and as such it is a very popular choice for tiled floors amongst home owners.

However, Travertine tiles are not the easiest to keep looking at their best. A high-quality polished finish can be difficult to maintain, especially as sealers wear away and all manner of dirt becomes ingrained in the pores of the stone.

The pictures below were taken at a house in Cambridge where the owner had this exact same problem and requested my help to get them looking their best again. The Travertine tiles had been installed across most of the entire ground floor of the house, including the kitchen, dining room, living room, office and utility room.

The owner was not happy with the current appearance of the floor because the shine and reflectivity that had once existed had gradually worn away. The floor was also littered with many pitted holes (caused by natural erosion) and a few cracks which would need to be filled.

Travertine Kitchen Floor Before Cleaning Cambridge Travertine Kitchen Floor Before Cleaning Cambridge

Cleaning and Burnishing Travertine Tiles

My first step in restoring the tiles was to remove the kick boards from around the kitchen and utility room, before masking up all walls and wooden units with protective décor film. This was done to prevent these areas from encountering any cleaning product.

Travertine Kitchen Floor Before Cleaning Cambridge
Next, I began the cleaning process by applying Tile Doctor Pro Clean across the entire area and worked it into the stone using a scrubbing brush fitted to my rotary machine. This high alkaline cleaner broke down any old sealer while also relieving the stone and grout lines of any ingrained dirt.

After the initial clean, I used the Tile Doctor system of four diamond encrusted burnishing pads on the tiles. Burnishing is a form of polishing that involves gradually honing the surface of the stone, first by applying a Coarse grit pad, followed by a Medium, Fine, and finally a Very Fine grit pad to achieve a high quality polished finish. The system uses a little water for lubrication and the floor is rinsed between each pad to remove the soil so it can take some time to complete especially on a floor this size.

Once I was done I filled in the pitted holes and cracks with an appropriate resin filler before applying the Very Fine pad.

Travertine Floor Tile After Crack Repair Cambridge

Sealing Travertine Tiles

To finish the restoration, the tiles needed to be sealed. I did this firstly by applying Tile Doctor Shine Powder, which is natural sealer in a crystallising powder form. I applied it using a white pad and polished the tiles to provide the very high shine and tough durable finish the client had requested.

Following this I applied one coat of Tile Doctor Ultra Seal, which is an impregnating sealer, to add further protection. To add the finishing touches, I quick buffed the floor with Tile Doctor Stone Patina Spray, a cleaner that is designed to enhance the natural beauty and lustre of polished stone as it cleans. Regular use of this product helps to maintain the polished effect.

Travertine Kitchen Floor After Cleaning Cambridge Travertine Kitchen Floor After Cleaning Cambridge

The customer absolutely loved her new floor. She even remarked that it looked as good as new and better than ever before.

Professional Tile Burnishing, Cleaning and Sealing for a Dirty Travertine Tiled Floor Restoration in Cambridge

Lustre Restored to Large Area of Travertine Tiles in Cambridge Read More »

Dirty and Stained Slate Tiles Refreshed Near Duxford

Dirty and Stained Slate Tiles Refreshed Near Duxford

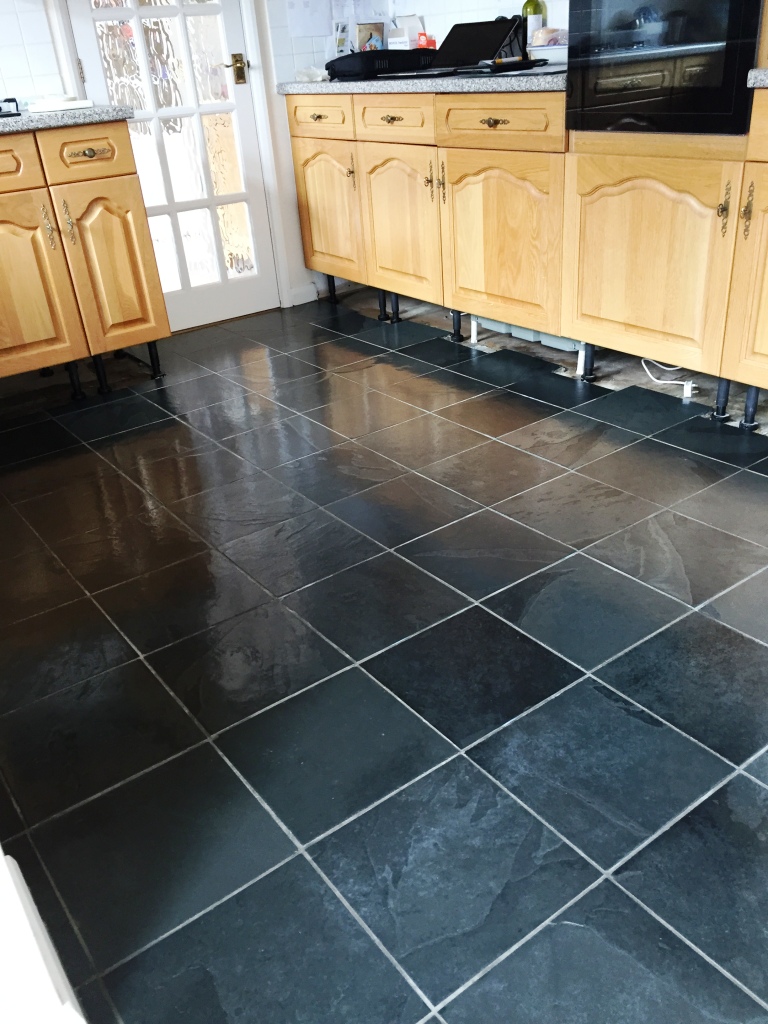
This wonderful Slate tiled floor at a property near the old village of Duxford had been installed throughout the ground floor kitchen, utility room, dining room, and downstairs toilet, making it a very large area. As such, the property owner had struggled to keep the tile and grout looking it’s best and had tried many off the shelf supermarket-quality products without much success and you can see from the photographs the slate was now looking tired and the grout was quite stained and so we were called in to work our magic

Slate Floor Duxford Before Cleaning
While Slate is typically known for its durability, any kind of porous stone will over time become dirty and stained if the sealer is not maintained, sealers do fail eventually and usually in the highest traffic areas first where they become worn down the most.

Slate Floor Duxford Before Cleaning

Cleaning Dirty Slate Tile

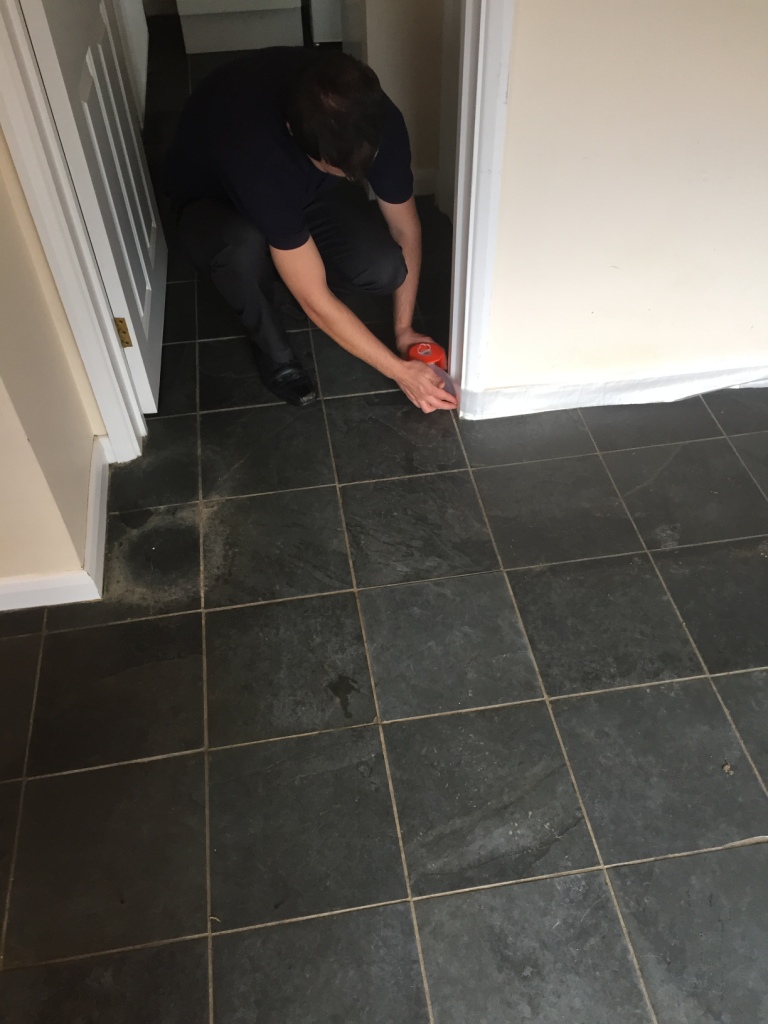
Before starting the cleaning process, we protected the walls and skirting boards from coming into contact with products by covering them with plastic. I also opted to remove the kickboards from around the edges of the kitchen units, kickboards are usually just clipped into place and are easily put back later.

Slate Floor Duxford Before Cleaning Adding Protection
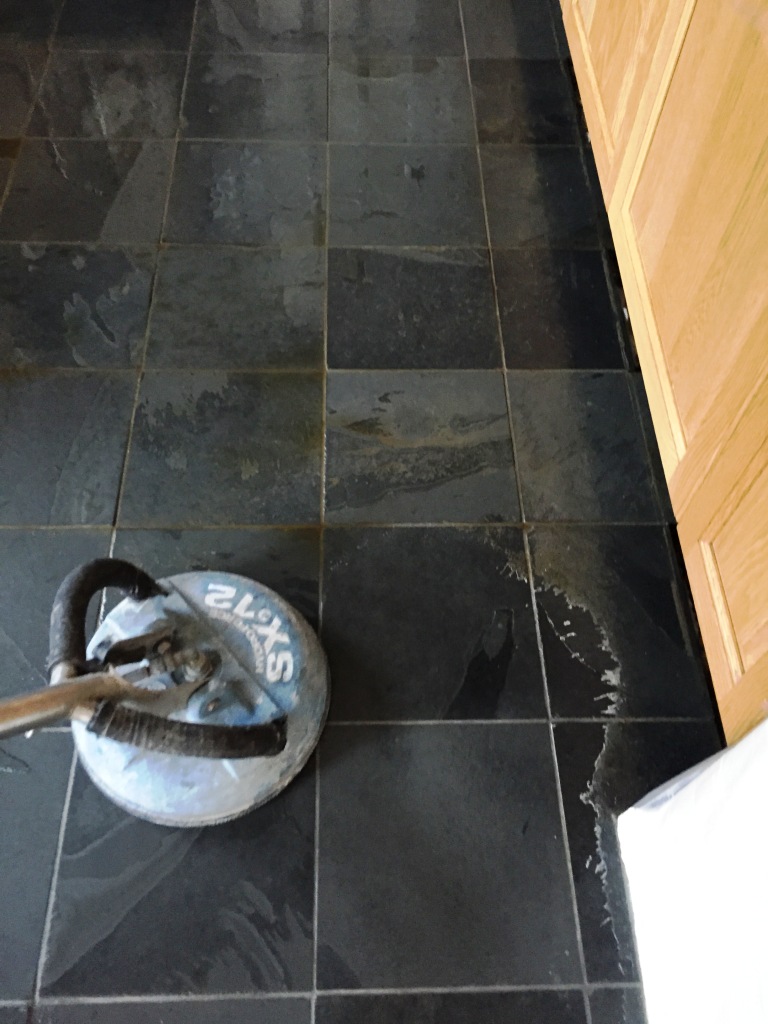
I then applied Tile Doctor Remove and Go to the floor, which is a multi-purpose stripper/cleaner designed to strip away old sealers and remove grout haze, adhesives and paints. It also draws out ingrained stains. The entire floor was blanketed in a thin plastic sheet to give the chemical time to emulsify the old sealers without drying out.

Slate Floor Duxford With Plastic Blanket
Next, I used our high-pressure extraction system to remove all the emulsified sealers. The system works by applying hot water under high pressure to the floor deep cleaning the tile, whilst simultaneously extracting the dirty water back to a tank on our van. This process did a great job of getting the floor clean and free of old sealers etc., and after completing the initial clean a thorough walk through of the floor was done to identify any stubborn areas that needed further treatment.

Slate Floor Duxford During Pressure Cleaning
Finally, the floor was left to dry overnight.

Sealing Slate Tiles

Upon arriving back at the property, the next day, I ran some quick damp tests to check that the floor was completely dry and ready to be sealed. Once satisfied, I applied several coats of Tile Doctor Seal and Go, which works really well on Slate giving it that much needed protection against dirt and stains, along with a full lustre finish that enhances the character of the floor, it was a large area and you have to wait for the first coat to dry before applying the next so it took some time to complete as I’m sure you can imagine.

Slate Floor Duxford After Cleaning and Sealing
You should be able to see the floor was quite transformed after our visit and needless to say the customer was very happy with the result.

Slate Floor Duxford After Cleaning and Sealing
 

Refurbishing a tired Slate Tiled Floor in Cambridgeshire

Dirty and Stained Slate Tiles Refreshed Near Duxford Read More »

Travertine Tiled Floor Stripped and Polished in Great Wilbraham

Travertine Tiled Floor Stripped and Polished in Great Wilbraham

If you want a polished stone floor to keep its appearance, then it will need a regular maintenance plan in place, without it the stone will lose its polish and start to look dull and un-inviting which was the story with this Travertine tiled floor installed throughout much of the grout floor of this house in the village of Great Wilbraham near Cambridge.

Travertine floor before polishing in Great Wilbraham Cambridge
I was able to find out from the owner that the floor was last treated six years ago with Lithofin Stain Stop which is a solvent based impregnating sealer which like all sealers will wear off after a few years. Naturally this depends on the amount of wear the floor receives and what tends to happen is this process occurs more rapidly in the high traffic areas leading to an uneven appearance.

Travertine floor before polishing in Great Wilbraham Cambridge
The best course of action now would be to remove what was left of the sealer and re-polish and seal the floor.

Filling Holes in Travertine

During my inspection of the floor I had noticed a number of irregular holes in one of the Travertine tiles which needed filling with a colour matching filler; this worked out quite well and as you can see from the photographs below the result looked entirely natural.

Travertine floor before filling in Great Wilbraham Cambridge Travertine floor after filling in Great Wilbraham Cambridge

Stripping the Sealer from Travertine Floor Tiles

After protecting the clients skirting boards with protective film we proceeded to burnish the floor through with a set of Tile Doctor Diamond encrusted honing pads.

Travertine floor before polishing in Great Wilbraham Cambridge
During the application of the first coarse pad we also added a strong dilution of Tile Doctor Pro-Clean combined with NanoTech Ultra-Clean to aid the removal of sealer residues from the pores of the Travertine. The floor was then rinsed and the soiled solution extracted using a wet vacuum.

Travertine floor during polishing in Great Wilbraham Cambridge
With the sealer remove we were now able to concentrate on building up the polish on the stone by applying the remaining pads from Medium, Fine through to Very Fine, each lubricated with a little water and ensuring to rinse in-between the application of each pad.

Sealing Travertine Floor Tiles

With the floor now clean and the polish restored the last step was to protect it so it would keep its appearance for as long as possible. There are a number of solutions for this but for a long durable shine I opted to work Tile Doctor Shine Powder into the Travertine.

The powder is applied liberally to the floor and then ground in using a slow speed floor rotary machine fitted with a white or tan buffing pad lubricated with water.

Travertine floor during polishing in Great Wilbraham Cambridge
The shine on the floor has now been restored and the client has a
beautiful and durable finish to their Travertine tiles.

Travertine floor after polishing in Great Wilbraham Cambridge Travertine floor after polishing in Great Wilbraham Cambridge


Large Travertine Floor Cleaned, Polished and Sealed in Cambridgeshire

Travertine Tiled Floor Stripped and Polished in Great Wilbraham Read More »

Limestone Tiled Floor Cleaned and Polished in Cambridge

Limestone Tiled Floor Cleaned and Polished in Cambridge

These photographs are from a Limestone tiled floor installed at a residence in Cambridge. The tiles were in good condition but the shine on the Limestone had worn off leaving them looking dull and the owner wanted them re-polishing.

Polishing Limestone Tiles in Cambridge During Cleaning Polishing Limestone Tiles in Cambridge During Cleaning

Stripping and Polishing Limestone Floor Tiles

To restore the shine on polished stone we use a set of four diamond encrusted pads however before starting we gave the floor tiles a general clean with a dilution of Tile Doctor Pro-Clean mainly to clean-up the grout but also to remove any loose surface grit. The cleaning solution was rinsed away and removed with a wet vacuum before starting the burnishing process using a rotary scrubbing machine fitted with a coarse diamond encrusted burnishing pad and a little water. The coarse pad strips off dirt and old sealers from the tile and the resulting slurry is then removed using a wet vacuum.

The next pad after coarse is a medium grit which you apply in the same way followed by the fine pad again with a little water until the floor is polished. The final step to bring up the polish on the Limestone is to apply the last “Very Fine” pad which is fitted to the rotary machine and run over the floor tiles until they are buffed to a nice shine.

Sealing Limestone Floor Tiles

Once the floor was dry we set about sealing it using two coats of Tile Doctor Colour Grow Sealer which is a penetrating sealer that soaks into the pores of the stone filling them so dirt can’t penetrate below the surface. As well as offering excellent protection Colour Grow lifts the colours in the stone enhancing it’s natural beauty. Once sealing was complete and dry the Limestone tiles were given a final buff with a soft white pad.

Polishing Limestone Tiles in Cambridge After Cleaning Polishing Limestone Tiles in Cambridge After Cleaning


Large Format Limestone Tiles Cleaned, Polished and Sealed in Cambridge

Limestone Tiled Floor Cleaned and Polished in Cambridge Read More »

Cleaning Quarry Tiles around an Indoor Residential Swimming Pool

Cleaning Quarry Tiles around an Indoor Residential Swimming Pool

Photographs below of a job we did cleaning and sealing the Quarry Tiles surrounding a residential indoor swimming pool floor tiles at a grand residence in Cambridge. As you can see from the photograph below the Quarry tiles and Grout was looking rather washed out and given their proximity to the pool extra care was needed to be ensure we didn’t contaminate the pool with dirty water from the cleaning process or chemicals, fortunately all our equipment is electrically isolated so that was not a problem.

Quarry Tiled Pool Surround Cambridge Before Cleaning Quarry Tiled Pool Surround Cambridge Before Cleaning

Swimming Pool Tile Cleaning

Fortunately the pool was fitted with a cover so we made a start cleaning the tiles using a strong dilution of Tile Doctor Pro-Clean mixed 50/50 with NanoTech Ultra Clean which add tiny abrasive particles into the cleaning solution making it more effective. Working in sections the solution was left to soak into the tile and grout before being worked into the floor using a rotary machine fitted with a scrubbing pad running at slow speed to reduce splashing. This process removed any remaining sealer and cleaned the tile and grout up nicely, we used clean water to rinse the floor and a wet vacuum to remove the soiled solution making sure not to drain any solutions into the pool and re-treating any stubborn areas. This process was fairly tedious and took up much of the day but the results were well worth the effort.

Quarry Tiled Pool Surround Cambridge After Cleaning Quarry Tiled Pool Surround Cambridge After Cleaning

Sealing Quarry Tiles around a Pool

The tiles were left to dry off overnight and we came back the next day to seal the floor using two coats of Tile Doctor Colour Grow which is an impregnating sealer that fills up the pores in a tile to protect it from stains whilst enhancing its natural colours.

Quarry Tiled Pool Surround Cambridge During Sealing
The process worked well and you can see the difference in the photographs above however the tricky nature of the environment meant it took longer than usual to complete but the main thing was the customer was happy with the result.

Quarry Tiled Pool Surround Cambridge After Sealing Quarry Tiled Pool Surround Cambridge After Sealing


Quarry Tiled Pool Surround Cleaned and Sealed in Cambridge

Cleaning Quarry Tiles around an Indoor Residential Swimming Pool Read More »

Slate Tiled Kitchen Floor Cleaned and Sealed in Harston

Slate Tiled Kitchen Floor Cleaned and Sealed in Harston

These photographs are from that lovely old period property in the village of Harston near Cambridge, you may recall an earlier post where I worked on the Victorian Tiled hallway. These photographs are from the Slate Tiled Kitchen floor which they asked me to clean and re-seal as well.

Harston Slate Tiled Floor Before Cleaning 1 Harston Slate Tiled Floor Before Cleaning Closeup Kitchen 2

Cleaning the Slate Tiled Floor

The process for cleaning and sealing slate is very similar to Victorian and Quarry tiles so this was as they say a bread and butter job for a Tile Doctor. The beauty of working in a kitchen is I was able to remove the kick boards instead of having to protect the skirting boards with tape. Once the preparation was done a dilution of Tile Doctor Pro-Clean was applied and left to soak into the Slate tile for a while before being worked in using a rotary machine fitted with a black scrubbing pad. Pro-Clean by the way is an alkaline cleaner so it’s safe to use on tile and stone unlike some acidic products which will cause damage over time.

Harston Slate Tiled Floor Cleaning 1 Harston Slate Tiled Floor Cleaning 2

As before I re-applied Pro-Clean on any stubborn stains and also gave the grout lines a good scrub with a stiff hand brush to make sure they were clean. Once happy with the general condition of the tile it was time to use the spinner tool which applies hot water under pressure effectively rinsing the floor whilst removing the water at the same time with suction. This does a great job of rinsing the floor and removing any trace of cleaning product before sealing, this is important to ensure a good finish when sealing.

Harston Slate Tiled Floor Rinse 1 Harston Slate Tiled Floor Rinse 2

Sealing the Slate Tiled Floor

The spinner tool does a good job of removing liquids from floors however the tile was still damp so it was left to dry assisted with air blowers until dry. Now normally I would use Tile Doctor Seal and Go to seal slate tile however the customer wanted a matt finish for this surface so it was sealed using two coats of Tile Doctor Ultra Seal which provides a more natural look it’s also recommended for use in food preparation areas.

Harston Slate Tiled Floor After Cleaning 1 Harston Slate Tiled Floor After Cleaning Closeup Kitchen 2


Cleaning and Sealing a Slate tiled kitchen floor in Harston, Cambridgeshire

Slate Tiled Kitchen Floor Cleaned and Sealed in Harston Read More »

Victorian Tiled Hallway Floor Cleaned and Sealed in Harston

Victorian Tiled Hallway Floor Cleaned and Sealed in Harston

These photographs are from a lovely old period property in the village of Harston near Cambridge which had an original Victorian Tiled floor installed throughout the hallway and stairwell. Considering its age the tiles were in a very good condition but they were looking dull and overdue for a deep clean and re-seal.

Victorian Tiled Floor Harston Hallway View Before Cleaning 1 Victorian Tiled Floor Harston Before Cleaning 2

Cleaning the Victorian Tiled Floor

Working in sections the first step was to protect the beautiful skirting boards with clear plastic fixed with decorator’s masking tape. This was followed by applying a dilution of Tile Doctor Pro-Clean and letting it soak into the tile for about 20 minutes before being agitated using a rotary machine fitted with a black scrubbing pad.

Victorian Tiled Floor Harston Skirting Protection 3 Victorian Tiled Floor Scrubbing Harston 4

This did a good job of cleaning the floor however there were some stubborn stains that needed further attention so more Pro-Clean was applied and worked in with a stiff hand brush as a steamer was used to help lift the dirt out of the pores in the tile. Once we were happy with the floor the soiled cleaning fluid was removed from the floor using a spinner tool which applies hot water under pressure effectively rinsing the floor whilst removing the water at the same time with suction.

Victorian Tiled Floor Harston Steam Cleaning 5 Victorian Tiled Floor Spinning and Steaming Harston 6

Sealing the Victorian Tiled Floor

The floor was left to dry assisted with air blowers before moving on to sealing with Tile Doctor Seal and Go which is a recommended sealer for Victorian floor tiles that provides on-going stain protection as well as adding a nice subtle shine to the floor.

Victorian Tiled Floor Harston After Cleaning and Sealing 7 Victorian Tiled Floor Harston Completed 8

The customer was really pleased with the results and even asked us back to do the slate tiles in the kitchen something I will no doubt write about in a later post.

Victorian Floor Cleaned and Sealed in Harston, Cambridgeshire

Victorian Tiled Hallway Floor Cleaned and Sealed in Harston Read More »

Sandstone Tiled Patio Cleaned in Cambridge

Sandstone Tiled Patio Cleaned in Cambridge

Just so you know we don’t just clean stone and tile floors we also do external patios as well and this particular job was at a property in Cambridge with a Sandstone patio. We have all the tools and products to clean most surfaces so cleaning patios and brick paved driveways isn’t a problem.

Sandstone Patio Before Cambridge 1 Sandstone Patio Before Cambridge 2

The process was quite straight forward and involved pre-soaking the driveway with Tile Doctor Pro-Clean, it’s a versatile cleaner that equally effective on Patios as well as Tile, Grout and Stone; being an alkaline cleaner it has the added advantage that it doesn’t cause damage to the surface that typical acid cleaners can.

Sandstone Patio During Cleaning Cambridge 1 Sandstone Patio During Cleaning Cambridge 2

The Pro-Clean was left to dwell on the patio for a good hour before scrubbing it in with a stiff brush and following up with a high pressure professional jet washing machine which did a great job dislodging the grime that had built up on the surface over time. You can see from the photographs what a difference it made.

Sandstone Patio Kiln Sanding Cambridge
Pressure washing can dislodge the grout joints so once we were done cleaning the floor the gaps between the tiles was filled in kiln dried sand.

Sandstone Patio Completed Cambridge 1 Sandstone Patio Completed Cambridge 2

I think you will agree the patio looks good as new.

Sandstone Tile Restoration in Cambridge

Sandstone Tiled Patio Cleaned in Cambridge Read More »

Quarry Tiled Kitchen Floor Cleaned and Sealed in Cambridge

Quarry Tiled Kitchen Floor Cleaned and Sealed in Cambridge

These photographs are from a Quarry Tile Cleaning job we did for a house owner in Cambridge, I’m afraid my photographs are not the best but I think you can see how the Quarry tiles were looking discoloured and worn.

Quarry Tiled Floor Cambridge Before

Cleaning Kitchen Quarry Tiles

Working in sections the floor was wetted with a dilution of Tile Doctor Pro-Clean combined 50/50 with Nanotech UltraClean, these two products combine to make a powerful and effective cleaning solution that’s safe to use on tile and stone. The solution was left to soak into the tile for twenty minutes whilst we got our machinery ready.

It helps if you have the right tools for the job and in this case we fitted a scrubbing pad to a rotary buffing machine and working the cleaning solution into the floor to scrub away the ingrained dirt. The machine can struggle to get into the grout lines so these need to be scrubbed by hand using a stiff brush and more cleaning solution. Once the floor was clean the soiled solution was picked up using a wet and dry vacuum and then washed down with clean water to remove any trace of chemical. This revealed a few stubborn areas that needed further work so these were re-treated and the floor washed down again and then left to dry overnight.

Sealing Kitchen Quarry Tiles

We came back the next day to seal the floor and after checking the tiles had indeed dried we proceeded to apply Tile Doctor Seal and Go which is a water based sealer (no smell) that really brings out the shine and colour in Quarry tiles. Around five coats were sufficient and once it had dried the floor was transformed.

Quarry Tiled Floor Cambridge After
 

Quarry Tile Renovation in Cambridge

Quarry Tiled Kitchen Floor Cleaned and Sealed in Cambridge Read More »

=================================

Cambridge Tile Doctor

================================= Read More »

Scroll to Top