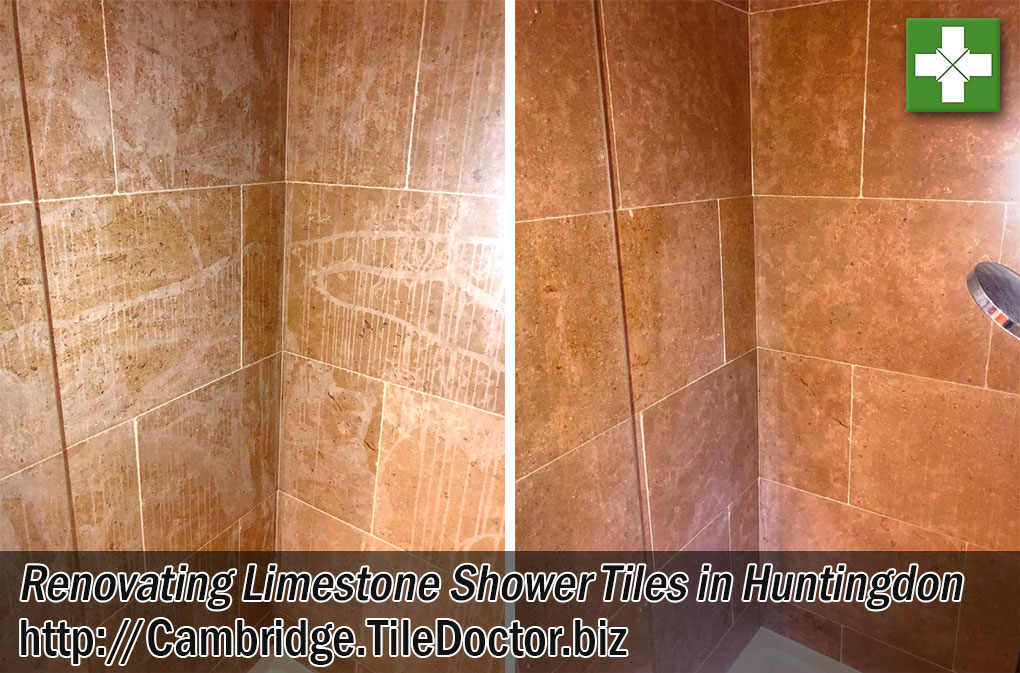

Heavily Soiled Limestone Floor Renovated in Lode Cambridge
I was contacted by a homeowner from the village of Lode near Cambridge about their beautiful Limestone floor that ran through most of the ground floor but mostly evident in the Kitchen.
The floor had not been deep cleaned and sealed for some years, and now with the sealer failing dirt was becoming lodged in the pores of the stone making it difficult to keep clean. What was once an attractive Limestone floor was now looking very grubby and un-appealing. The owner unhappy with its appearance asked if I could pop over and provide a price for renovating the floor.

I went over to survey the tiles and provide a quote as requested. It was immediately clear to me that as suspected the sealer had definitely worn off and dirt was now building up in the pores of the stone where it’s difficult to shift. Whilst there I conducted a test clean of the floor so they could see the difference we could achieve and it was quite a contrast.
 |
 |
Happy with the potential transformation I was booked to do the work and replace some grout that was missing in places.
Cleaning and Burnishing Limestone Tiles
Before beginning the restoration, I took the necessary precaution of covering the walls and kitchen units to protect them from exposure to cleaning products or mess.
Once that was done, I started the cleaning by applying Tile Doctor Remove and Go, which is a high-performance stripping and cleaning agent, to break down what was left of the sealer. This product can also be used to clean the stone itself, as well as the grout lines. I applied a strong dilution to the Limestone and grout lines and then let it soak in for ten minutes before scrubbing it in with a black pad fitted to a rotary buffer machine. Once done the soiling was rinsed away with water and removed with our high-pressure van mounted extraction system.
After completing the initial cleaning process, I moved on to restoring the polish to the tiles which we do with a set of diamond encrusted Burnishing Pads. Each pad has a different level of grit to grind away the dirt from the stone and build up the polished appearance. The process effectively resurfaces the stone leaving it looking new and fresh.
The process starts with the application of a coarse 400-grit pad, fitted to a rotary machine, to grind away any excess muck and sealant lubricated with a little water. The resultant slurry is rinsed away and I followed up with the application of the Medium 800 grit pad to start the restoration of the polish again with a small amount of water, followed by the Fine 1500 grit pad for the second polish.
Before finishing for the day, I regrouted those areas that needed attention and then left the floor to dry off overnight.
Sealing Limestone Tiles
The next day I started with the application of the last burnishing pad which is a very fine 3000-grit pad to achieve the most refined and highest quality polish possible. The process of burnishing is a gradual but highly effective means of achieving this kind of finish. This last pad is applied dry with only a little water sprayed onto the surface and leaves the floor dry.
The last step was to seal the floor and after discussing this with the owner previously it was clear they wanted the Limestone to keep its light appearance and so to seal the floor we used Tile Doctor Ultra Seal. This is a premium impregnating sealer that works by occupying the pores in the tile thereby preventing dirt from becoming lodged there.
 |
 |
I completed the job just in time for Christmas 2022 and as you can see from the photos the Limestone was transformed. Needless to say, the client was extremely happy with the result and pleased the floor would be in good shape in time for the festivities.
For the regular cleaning of polished stone like this floor I recommend the use of Tile Doctor Stone Soap which is a gentle yet effective tile cleaner that helps maintain the patina.

Professional Polishing of a Dull Limestone Tiled Floor in Cambridgeshire
Heavily Soiled Limestone Floor Renovated in Lode Cambridge Read More »